
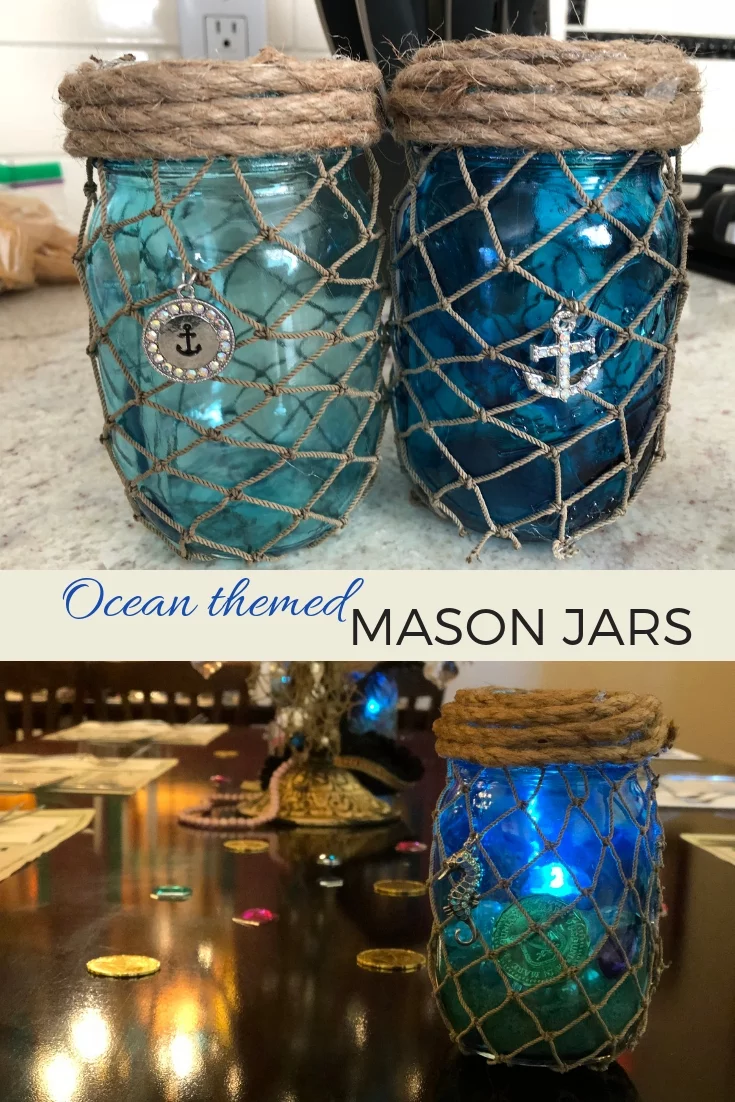
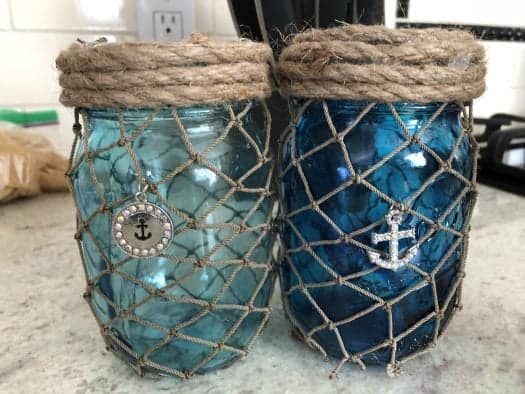
I absolutely love the way these netted mason jars came out! They are super piratey, but also super classy. I made these for the pirate themed bridal shower I hosted for a good friend of mine.
DISCLOSURE: This post may contain affiliate links. If you purchase items through my links I may earn a commission. You will not pay more when buying a product through my link and you do not have to use my links. I only recommend products & systems that I use and love myself, so I know you’ll be in good hands. You can find our full policy here. Thank you in advance for your support.
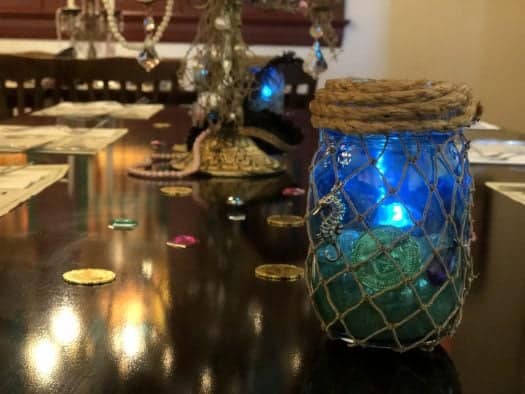
These netted mason jar decorations would be perfect for a variety of parties, and they are even useful after the party is over! Be sure to check out how I used these in Little Miss’ room.
I also gave some to the bride and she uses them on her patio. See they are multi-functional!
Netted Mason Jar Decorations
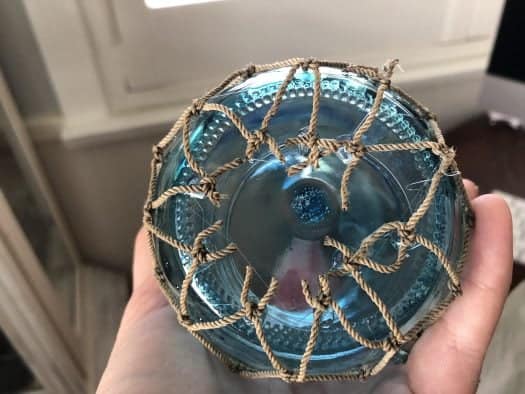
These netted mason jar decorations are super easy to make. You can use any color mason jar you want. I used the tinted mason jars that I made.
The decorative netting I purchased at Hobby Lobby, but you can also find it at Michaels. Some of the netting comes with sea shells that would be great additions to these as well!
A little netting goes a long way! Remember you’ll be pulling it out, so even if it doesn’t look like much when you buy it, it’s actually a lot.
I found it easiest to wrap the netting around the jar first, pulling it tight, and then cut and glue.
When gluing, glue one side first. I used dots of hot glue where the knots hit the mason jar.
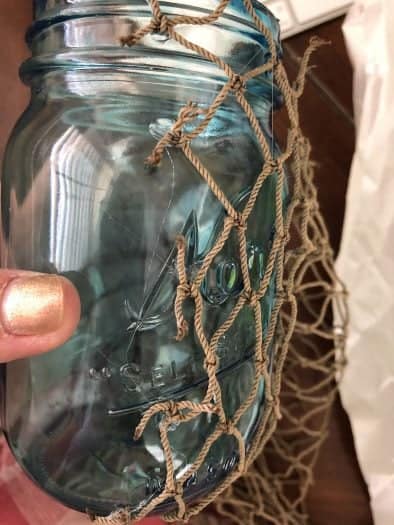
Then pull tight and glue around the mason jar on the top and bottom only. This will be enough to hold the netting on and won’t mess up the sides too much.
Once you get back to where you started, again glue the knots too the mason jar. I tried to make them as close to the starting point as possible.
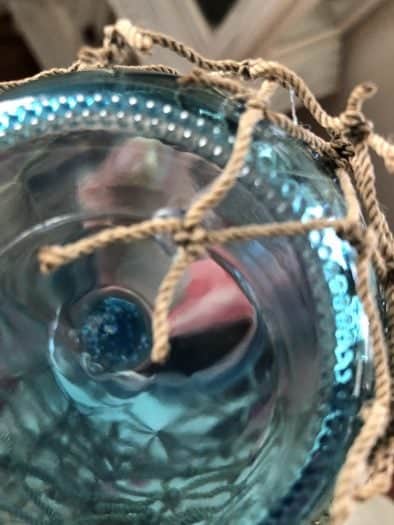
The bottom won’t be perfect but as long as it sits steady, all the unfinished edges will be covered.
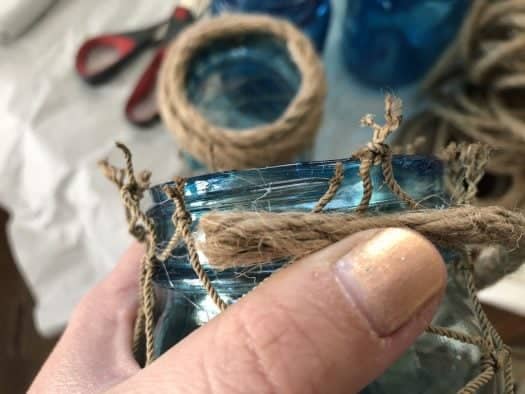
Now we have this unfinished top that we need to take care of.
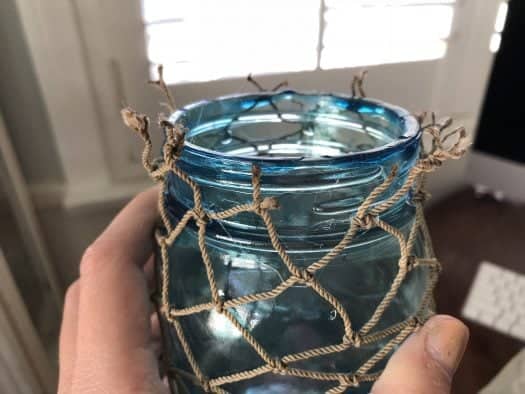
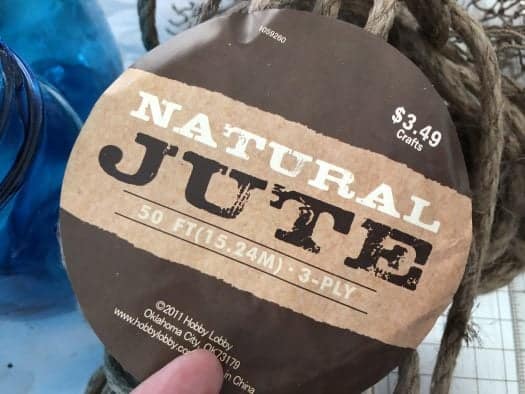
I used this natural jute to give it a rustic look and cover the top of the mason jar. There’s all different sizes of jute. I thought the larger one looked better on mine, but feel free to use any size.
Put a dollop of the hot glue right above the lip on the mason jar and glue the jute around the top. You don’t have to cut the jute until the end. I just looped it around and over itself until it was covering the whole top of the mason jar.
Now you can add your gems, sand, jewels, and anything else you want. I found these cute little anchor gems to hang from the front of them.
They were a huge hit at the party! Everyone loved them, especially the bride.
I hope you’ll make these ocean themed netted mason jars! You can use this cute image I had created to make these cute jars.
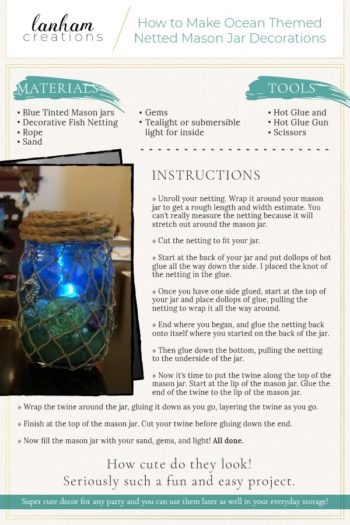

How to Make Ocean Themed Netted Mason Jar Decorations
Create beautiful mason jar decorations perfect for any ocean or pirate themed party!
Materials
- Blue Tinted Mason jars
- Decorative Fish Netting
- Rope
- Sand
- Gems
- Tealight or submersible light for inside
Tools
- Hot Glue and Hot Glue Gun
- Scissors
Instructions
- Unroll your netting. Wrap is around your mason jar to get a rough length and width estimate. You can’t really measure the netting because it will stretch out around the mason jar.
- Cut the netting to fit your jar.
- Start at the back of your jar and put dollops of hot glue all the way down the side. I placed the knot of the netting in the glue.
- Once you have one side glued, start at the top of your jar and place dollops of glue, pulling the netting to wrap it all the way around.
- End where you began, and glue the netting back onto itself where you started on the back of the jar.
- Then glue down the bottom, pulling the netting to the underside of the jar.
- Now it’s time to put the twine along the top of the mason jar. Start at the lip of the mason jar. Glue the end of the twine to the lip of the mason jar.
- Wrap the twine around the jar, gluing it down as you go, layering the twine as you go.
- Finish at the top of the mason jar. Cut your twine before gluing down the end.
- Now fill the mason jar with your sand, gems, and light! All done.
- How cute do they look! Seriously such a fun and easy project.
- Super cute decor for any party and you can use them later as well in your everyday storage!
Pingback: DIY Pirate Chest -
Pingback: How to Make a Pirate Wedding Wishes Jar -
Pingback: Pirate Bridal Shower Decorations -
Pingback: Tinted Mason Jars - How to make tinted mason jars