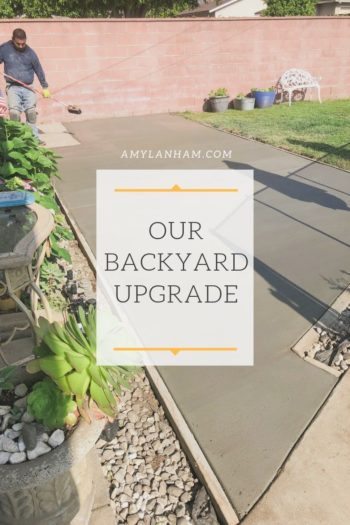
I love an budget friendly project! Check out this inexpensive patio refresh just in time for summer!

DISCLOSURE: This post may contain affiliate links. If you purchase items through my links I may earn a commission. You can find our full policy here. Thank you.
I have a little patio off the kitchen that could be so cute! But it’s always cluttered with toys.
This patio is the only covered space we have in our backyard. So it became a storage area for all the kids toys.
I wanted to keep their toys out of the hot Arizona sun and protect them from any rain we got. So this area felt like an obvious solution. But it meant that we couldn’t use this area to it’s full potential.
I put a hammock here and that’s been what this space has been for over a year. A hammock and a half storage shelf full of toys.
I had used half of a garage storage shelf, so I moved that to the other side of the house. Eventually we’ll have to build a shed for it, but that’s future Amy’s problem!
Want more ideas like this? Subscribe today and get access to our VIP library with tons of free printables and our monthly newsletter full of DIY ideas.
Cleaning Up The Patio
Once the toys were moved off the patio, I could really clean it. I took a broom and swept up any of the larger debris and then power washed it.
Arizona is extremely dusty and windy! I feel like I could probably power wash the area once a week and still get a whole bunch of dirt and grime up!

Now comes the fun part, decorating!
Seating Area
I really wanted a seating area. Last year, we had a small table under here. That table has since been moved to the other side of the yard.
Our house has an interesting backyard shape. It’s kind of a U, with the two sides being much bigger than the back. So this small patio really just looks at a wall. We don’t use this space a ton, mostly because there’s been nothing here.
But it’s the coolest spot in the backyard during the summers, and the only covered area to watch Monsoons. So I know that we would use this space if it was functional.
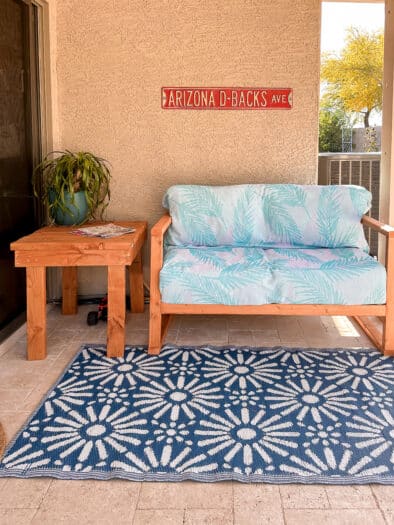
I found this cute outdoor couch and had John build it for me without the slats on the sides. We ended up adding a 2×3 to the bottom to raise the bench up a little bit. Had I realized earlier, we would have cut the legs 2 inches taller, but I like the final look.

We had some leftover wood from a small deck build, and my son and John made a table with it. I stained the table and couch the same color with some all in one outdoor stain.

Then it came time for the cushions! Why are cushions so difficult. I bought some from Walmart that I ended up not liking. So I went to Homegoods. They have a ton right now.
Love the ideas you see here on AmyLanham.com? Subscribe today and get access to our VIP library with tons of free printables and our monthly newsletter full of DIY ideas.
I chose two, one with a thicker cushion and one in a fun print. After getting them home and testing them both out, I decided to go with the one that has the thicker cushion.

It’s not as cute, but I figured I could throw a towel over it. Which adds some fun and helps protect the cushions from all the kids and dogs.
The bench and cushions cost about $175.
Add Some Fun
I went to Five Below and saw they had some cute outdoor items. I bought a rug and doormat.
My house is being overrun with houseplants, so I picked one that I knew could survive the summer heat in the shade and brought it out. It adds some much needed greenery to this patio.
Time to Rearrange
After getting the couch all set up, I decided maybe I wanted to try it a different way. The rug was sitting in the walkway and I was worried about the kids tripping.

Also, when sitting on the bench, I was just staring at the pool area. I thought maybe I should swap the hammock and the couch. So I did just that.
The hammock fits perfectly on the other side and is now fully protected. I put the couch up against the fence and it created a nice open walkway.

But then, sitting on the couch, I realized this cut off the pool area completely. We won’t normally have people in the pool area and people on the patio, but I still didn’t love that it was completely cut off.
So I moved the couch again! Never be afraid to arrange and rearrange. You can always put it back.
I moved the couch to the wall. The walkway is still open, the rug doesn’t interfere with it. But now I can sit on the couch and also talk with someone in the pool area.

We also have enough room to add a chair now! I think we’ll build this chair that matches the couch. Heck, maybe even the outdoor coffee table too!

Add Lights
These were technically already here, but a space is never complete without some lights. I love how fun and colorful these ones are.

And the small hanging light really helps to define the space. It works perfectly over the new seating area.
Final Results
So for just under $200, I was able to create a cute sitting area that is no longer an eyesore and is an area we can actually use.

What’s Next?
If you enjoyed this outdoor improvement projects you might like these other improvement projects too: