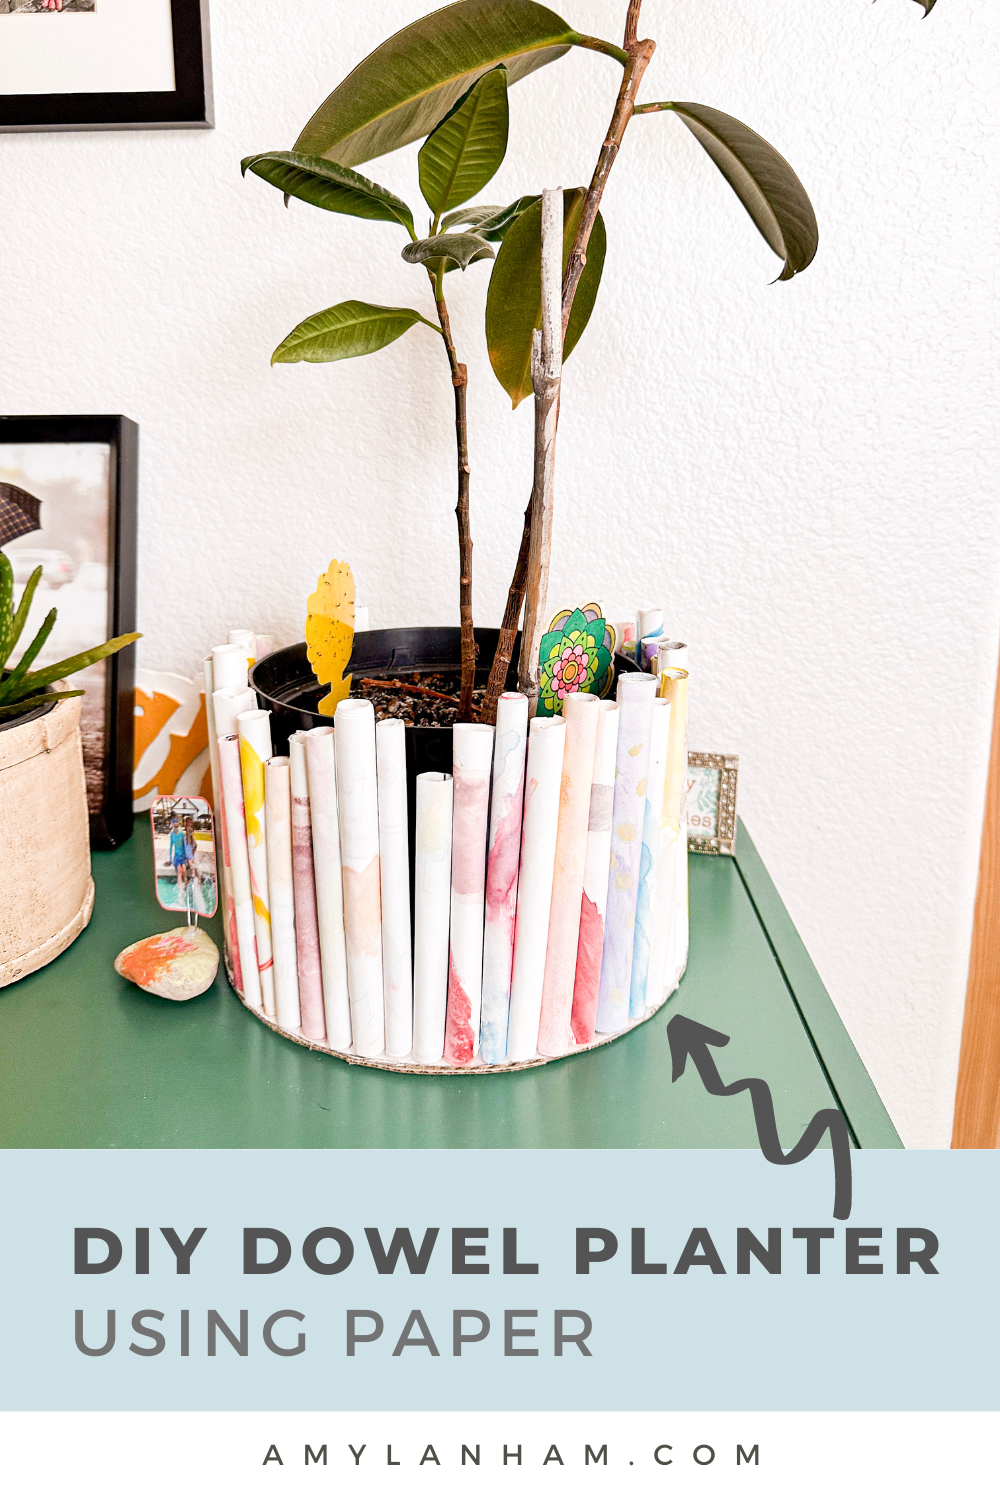
I love a no-waste project using stuff I already have from home! This DIY no-waste dowel planter was completely free and looks adorable.
DISCLOSURE: This post may contain affiliate links. If you purchase items through my links I may earn a commission. You can find our full policy here. Thank you.
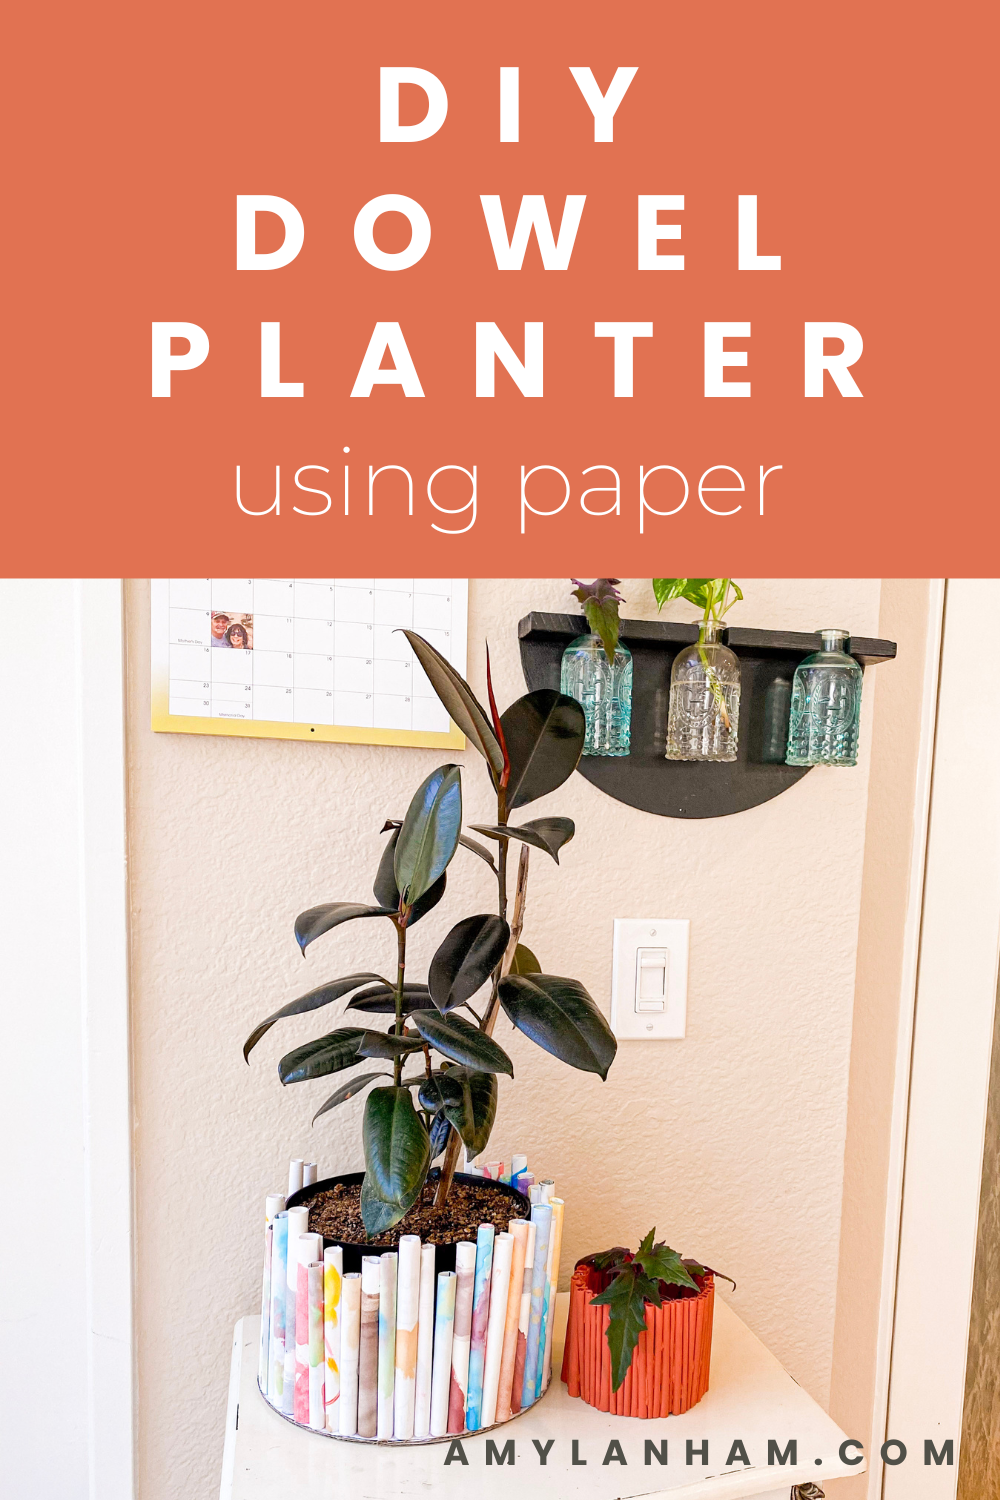
I’ve seen these DIY wood dowel planters everywhere. They’re so cute and a great way to make a planter to fit any size plant. But I hate buying new things just for a DIY so I found a way to make a similar looking planter for zero dollars.
Have you seen these DIY wood dowel planters? I loved the look so much and that they are so customizable. I’m always looking for unique and fun pots for my ever growing collection of plants.
Want more ideas like this? Subscribe today and get access to our VIP library with tons of free printables and our monthly newsletter full of DIY ideas.
I especially like finding inexpensive plant pots. Pots can be so expensive! And I’m on a budget over here.
So I wanted to make a dowel planter myself, but I also really didn’t want to spend any money to make one. My favorite type of projects are projects that can reuse things that are already in our home.
Reusing What We Already Have
I try very hard to be sustainable in our home. I don’t always succeed, but I love to reuse and repurpose things whenever I can.
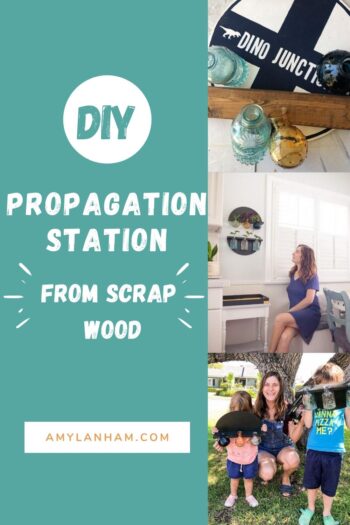
Some of my other favorite no-waste projects are: scrap wood propagation station, pumpkin and poison jars for Halloween, and reversible purses.
My kids love crafts. Which should shock absolutely no one! They especially love painting, drawing, and coloring. Which means we go through a lot of paper in our house.
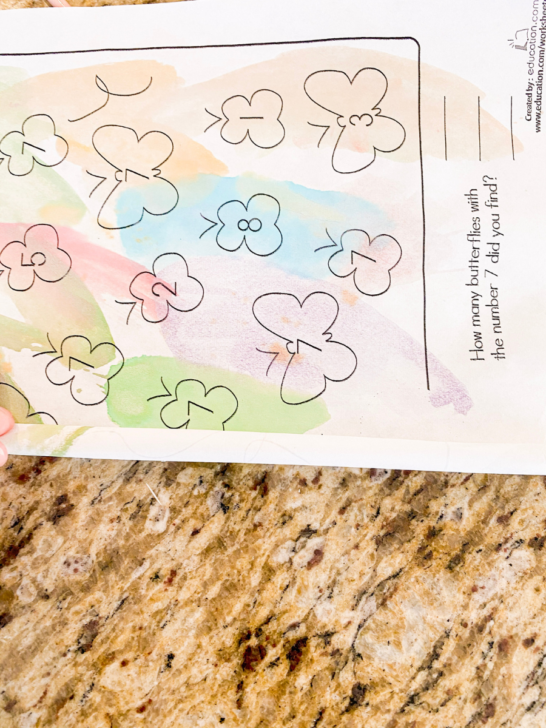
I know that’s not super sustainable. I try to find ways to make their love of crafts more sustainable without limiting their enjoyment and learning. We recycle, feed our worms, and reuse their drawing for wrapping paper.
While looking at a big pile of some of their water coloring, I thought I could probably make some DIY dowels out of their paper. And it worked!
How To Make No-Waste Dowel Planter
Using my kids artwork and a few supplies I make these trendy dowel planters.
What You Need:
Here’s what you’ll need from the store.
Tools Needed:
- Scissors
- Hot Glue Gun
- Paint Brush (optional)
Supplies Needed:
- Paper, old artwork works great, or printer paper, construction paper, anything
- Cardboard
- Sharpie
- Paint (optional)
- Plant
DIY No-Waste Dowel Planter Tips
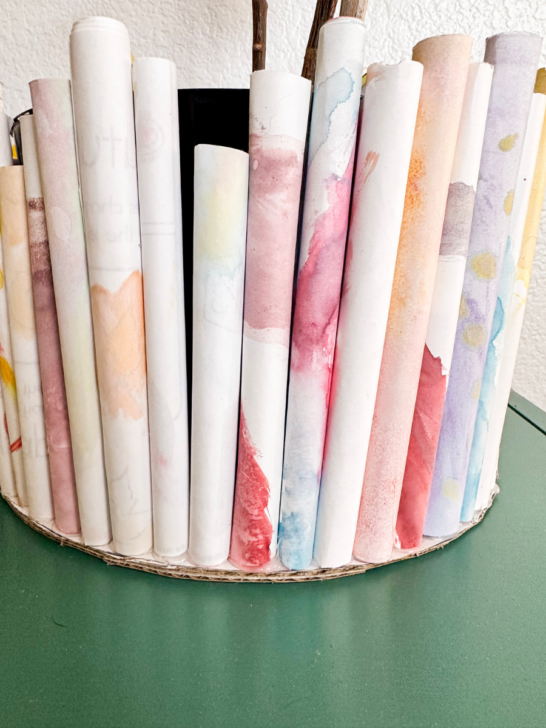
I made two different pots, one with the dowels in differing lengths, and one with them all the same length. But there are so many ways to customize this project!
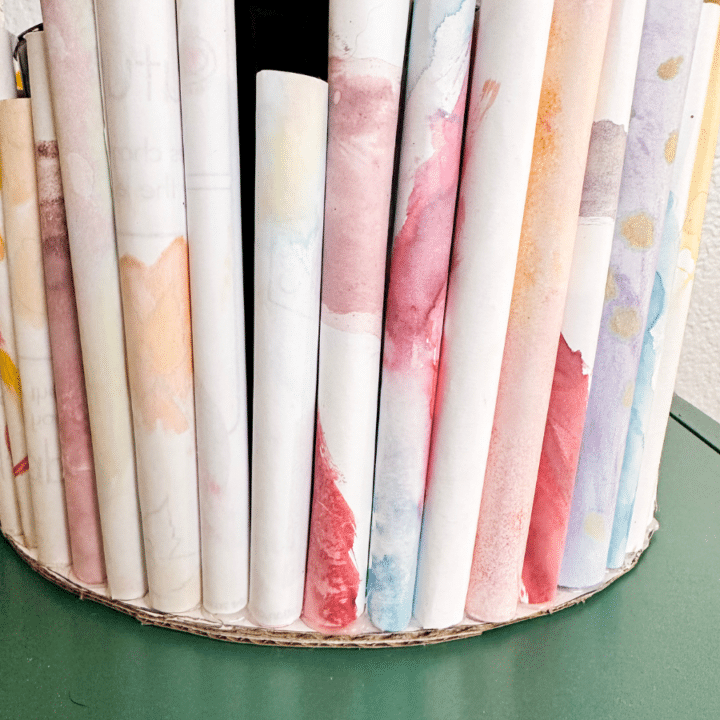
The original plan was to paint the pots when I was done. But I loved the water color pot so much I decided to leave it as it was.
I love that it’s my kids artwork. It looks great and it’s very special to me. So I made a second one to paint.
It came out great too! They are extraordinarily sturdy. They’ve survived for over two years now (and 2 moves!) and still look great!
I love this DIY no-waste dowel planter so much. It’s zero-waste, free, and long lasting. It’s the best! If you make it please tag me on Instagram, I’d love to see it!
How Much Paper Do I Need?
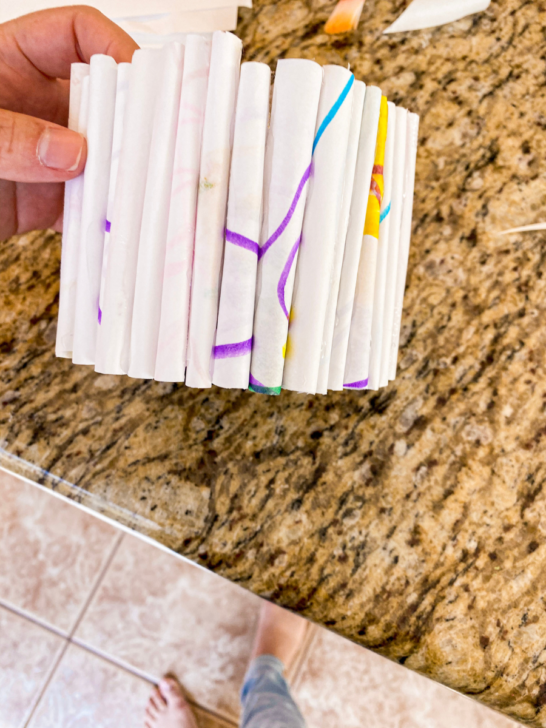
This will depend on how large or small you make your planter and how big or small you make the paper dowels. For the smaller planter, I cut the paper down and made the dowels thinner. The smaller planter I made has 44 rolled paper dowels and the dowels go all the way around the pot.
The bigger one, I used a full size paper to make the dowels, so they are thicker. The bigger one has 42, but I ran out of dowels so they don’t go all of the way around the pot. Just make as many rolled papers as you can before you get started. I also make them all the same thickness for each pot, but played with the heights.
What Type of Paper Should We Use?
My kids mostly color on construction paper or drawing paper. So any thin paper, even copier paper, will be fine. A thicker paper, like cardstock will be harder to roll but will still work.
Does It Warp When Wet?
I pull my plants out to water them and then put them back after. I don’t let them dry completely, just until they’re not dripping water and have never had a problem.
Are the Dowels Sturdy?
Yes! Very sturdy. The key is to roll the paper tightly. This will give the paper structure and keep it rigid. I wouldn’t stack things on top of the papers as they might squish a little, but it is very sturdy for general use.
Also, gluing the dowels to one another make it even sturdier. And if you choose to paint it, that also helps add structure. But as I stated above, I made these 2 years ago and they’ve gone through 2 moves and look as good as the day I made them!
DIY No-Waste Dowel Planter
Use old paper to make a no-waste dowel planter pot to show off your plants!
Materials
- Paper
- Cardboard
- Paint- optional
- Plant
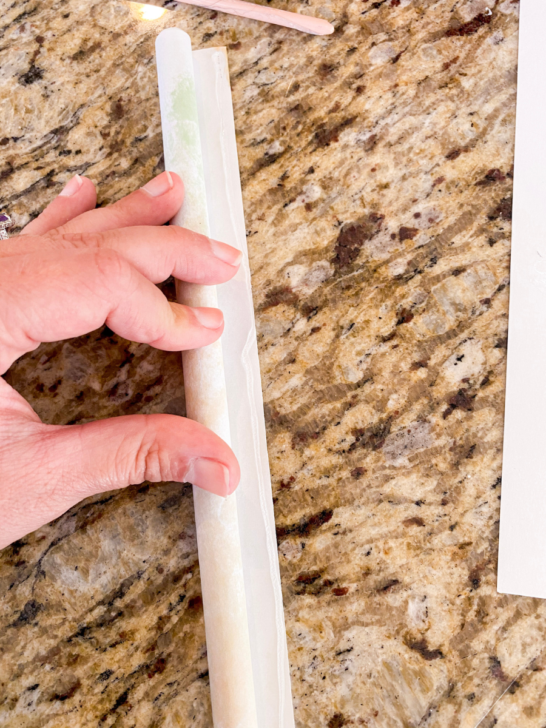
- 1. Start with the long edge of the paper and roll it up tight. Use hot glue to secure the edge of the paper. Cut the dowels down to whatever size you want. 2. Use your plant to help measure the size circle you need to cut your cardboard. Draw with a sharpie a circle slightly larger than your pot on the cardboard. Cut out the circle. 3. Center your plant on the cardboard and start hot gluing the paper dowels to the cardboard standing straight up. Secure the dowels to one another using hot glue in the back. 4. Continue gluing the paper dowels around the pot until you make it back to where you started. 5. Optional- use acrylic paint to paint the paper dowels when you are finished. Notes: for smaller dowels, cut the paper in half first. This will make thinner dowels.Sharpie
Tools
- Scissors
- Hot Glue
Instructions
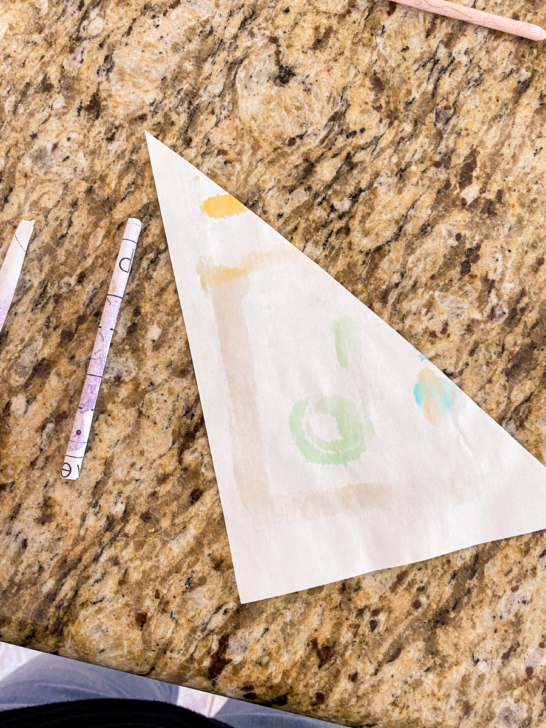
- Start with the long edge of the paper and roll it up tight. Use hot glue to secure the edge of the paper. Cut the dowels down to whatever size you want.
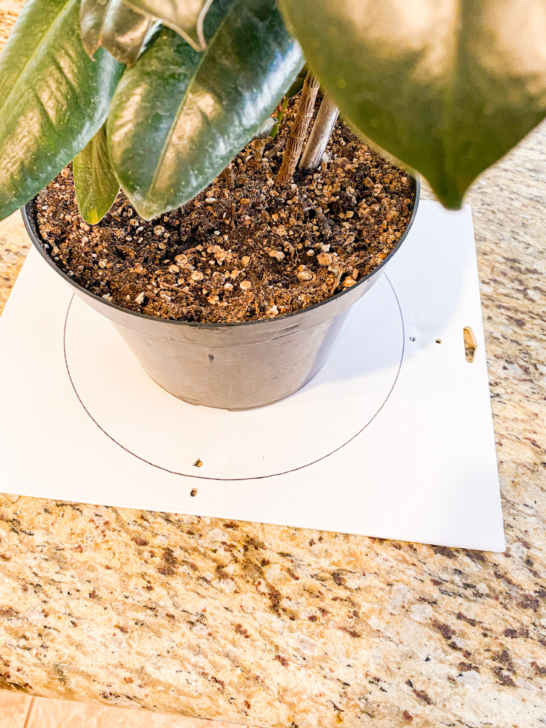
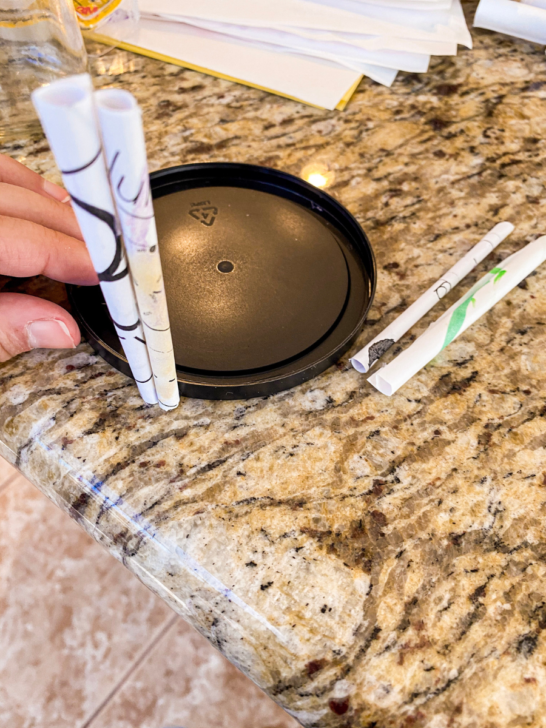
Use your plant to help measure the size circle you need to cut your cardboard. Draw with a sharpie a circle slightly larger than your pot on the cardboard. Cut out the circle.
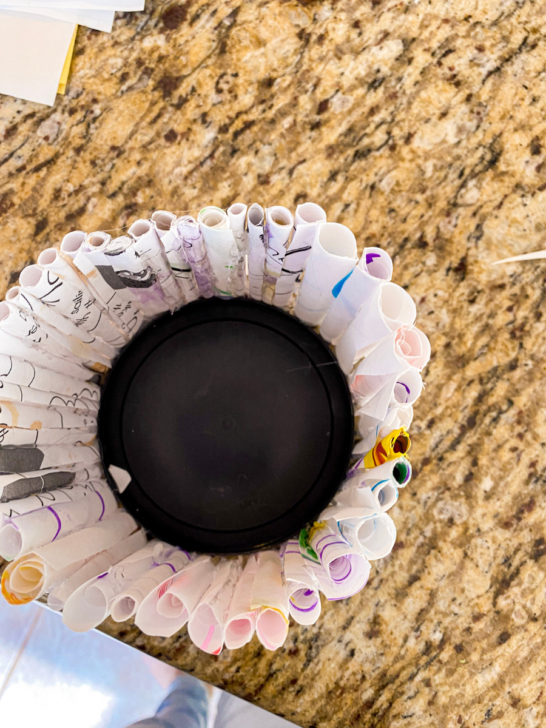
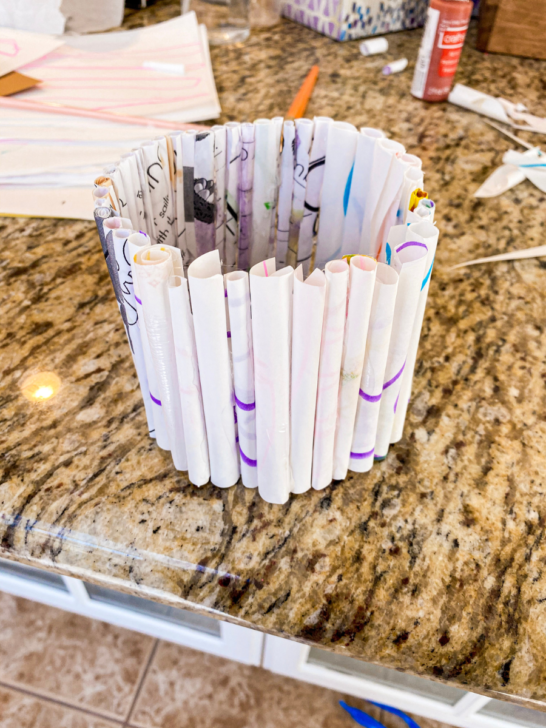
Center your plant on the cardboard and start hot gluing the paper dowels to the cardboard standing straight up. Secure the dowels to one another using hot glue in the back.
Continue gluing the paper dowels around the pot until you make it back to where you started.
Optional- use acrylic paint to paint the paper dowels when you are finished.
Notes
Notes: If you want thinner dowels, cut the paper in half first. This will make thinner dowels.
Love the ideas you see here on AmyLanham.com? Subscribe today and get access to our VIP library with tons of free printables and our monthly newsletter full of DIY ideas.
What’s Next?
If you enjoyed this no-waste project, you might enjoy these other no-waste ideas.
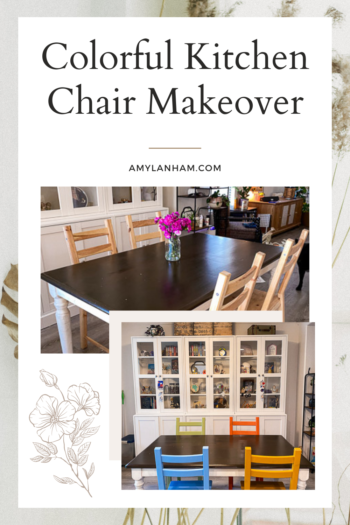
Colorful Kitchen Chair Makeover
DIY Propagation Station from Scrap Wood
Toilet Paper Roll Crafts – DIY Fake Candles