
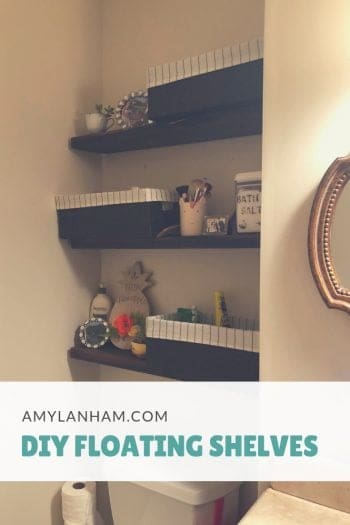
When we moved into this house the first thing I wanted to do was install floating shelves in the bathroom. The bathroom had this cute little recessed wall where the toilet is and I knew shelves would be perfect there. There’s one cabinet with not a lot of storage, so we could definitely use the extra storage space and I thought it would look really cute.

DISCLOSURE: This post may contain affiliate links. If you purchase items through my links I may earn a commission. You will not pay more when buying a product through my link and you do not have to use my links. I only recommend products & systems that I use and love myself, so I know you’ll be in good hands. You can find our full policy here. Thank you in advance for your support.
First, I looked everywhere for floating shelves, or just cute rustic shelves I liked. I checked Target, Hobby Lobby, Walmart. There were a few I liked, but one universal problem.
The shelves at all the stores are either 24 inches or 36 inches. My wall is 31.75 inches. I bought a 24 inch shelf from Hobby Lobby to try it out. It looked so tiny.
Another problem, the shelves were far too narrow! Most that I found were 5 to 6 inches deep. Way too narrow to put any baskets on.
So I set out to make my own shelves, with the help of my husband of course. We decided to use a 2×10 piece of wood. Wide enough to allow baskets and other items to fit.
The baskets actually sit off the front just a little bit, but not enough that it’s that big of a deal. If I had to do it over, I might put two pieces of wood together and install them like How To Nest For Less did.
DIY Floating Shelves
After we’d picked out our wood, we had the guys at Home Depot cut it for us. We picked out the least bowed piece we could find, but it still had some bowing.
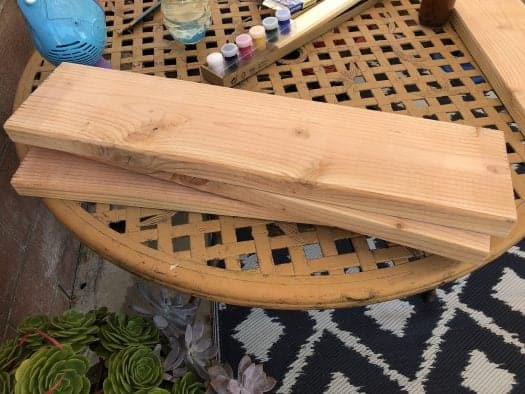
We had them cut it to 31 inches. This way we knew it would fit in the recessed part of the wall and gave us a little wiggle room on the sides.
I set out to make my DIY wood stain. Once the stain was finished, I painted it on the shelves. I decided I wanted three shelves, but we had an extra piece of wood after all the cuts, so I decided to experiment with it.
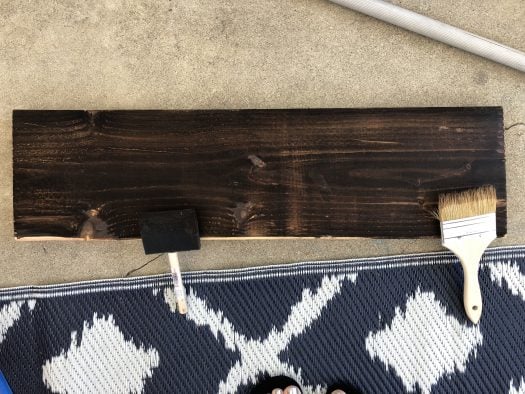
I liked the paint brush best for applying the stain, so I used that. The stain went on very dark and then dried to a lighter more red color. It took about 30 minutes to fully dry.
But even after letting it dry overnight, the stain was still coming off the wood after drying. I had Annie Sloan Clear Wax on hand, so I used that to “set” the stain. I love the way this looks after applying the wax. You can see so much more texture and all the imperfections.
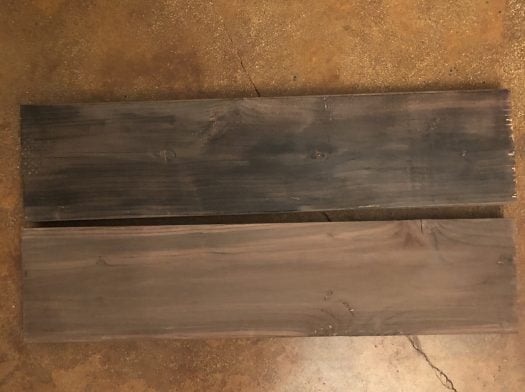
I was going for a really rustic barn wood look and the DIY stain mixed with the Clear Wax really gave me the feel I was going for.
I let the wood dry over night and then my husband drilled the holes and installed the shelves. Since I wanted floating shelves, he used a kreg jig to put in pocket holes in. Then used two 45 pound wall anchors to attach the shelves to the wall.
In retrospect he should have drilled the holes in first. He wanted to, and I was too excited to get started. Since he’d never used the jig before it took him a while to get it figured out. That means the wood has some extra holes in it.
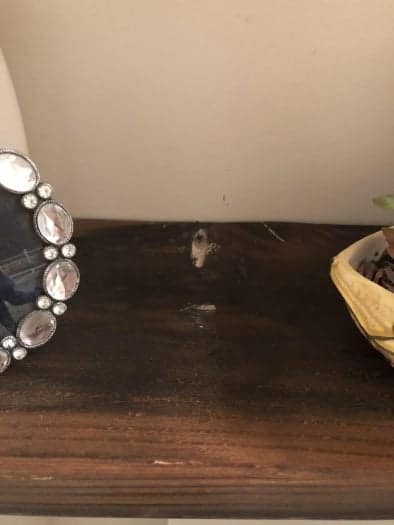
If he would have drilled the holes in first, the stain also would have been able to get into the holes making them less visible. It’s not a huge deal, because the holes are on the top of the shelves they’re easy to cover and you can’t see them on the higher shelves at all. But something to keep in mind for next time.
Overall, I love the way the shelves look. There are things that I’ll know better for next time. And if we ever do anything like this again, I’m definitely installing them like How To Nest For Less did.
What do you think? Is this something you would try at home?
I love these! They look just perfect in that nook area. I think they would work in our bathroom!
Our bathroom is so tiny, the only shelves we have in there are the ones in the cabinets, and that’s all there’s room for. We did tear an oven out of the kitchen and hung shelves in the empty space, but we put them all the way across from side to side.
Pingback: 38 DIY Home Decor Projects You Can Do For $50 Or Less
Pingback: DIY Towel Rack - Ikea Hack -
Pingback: 10 Ways to Organize a Small Bathroom | Clutter Keeper