
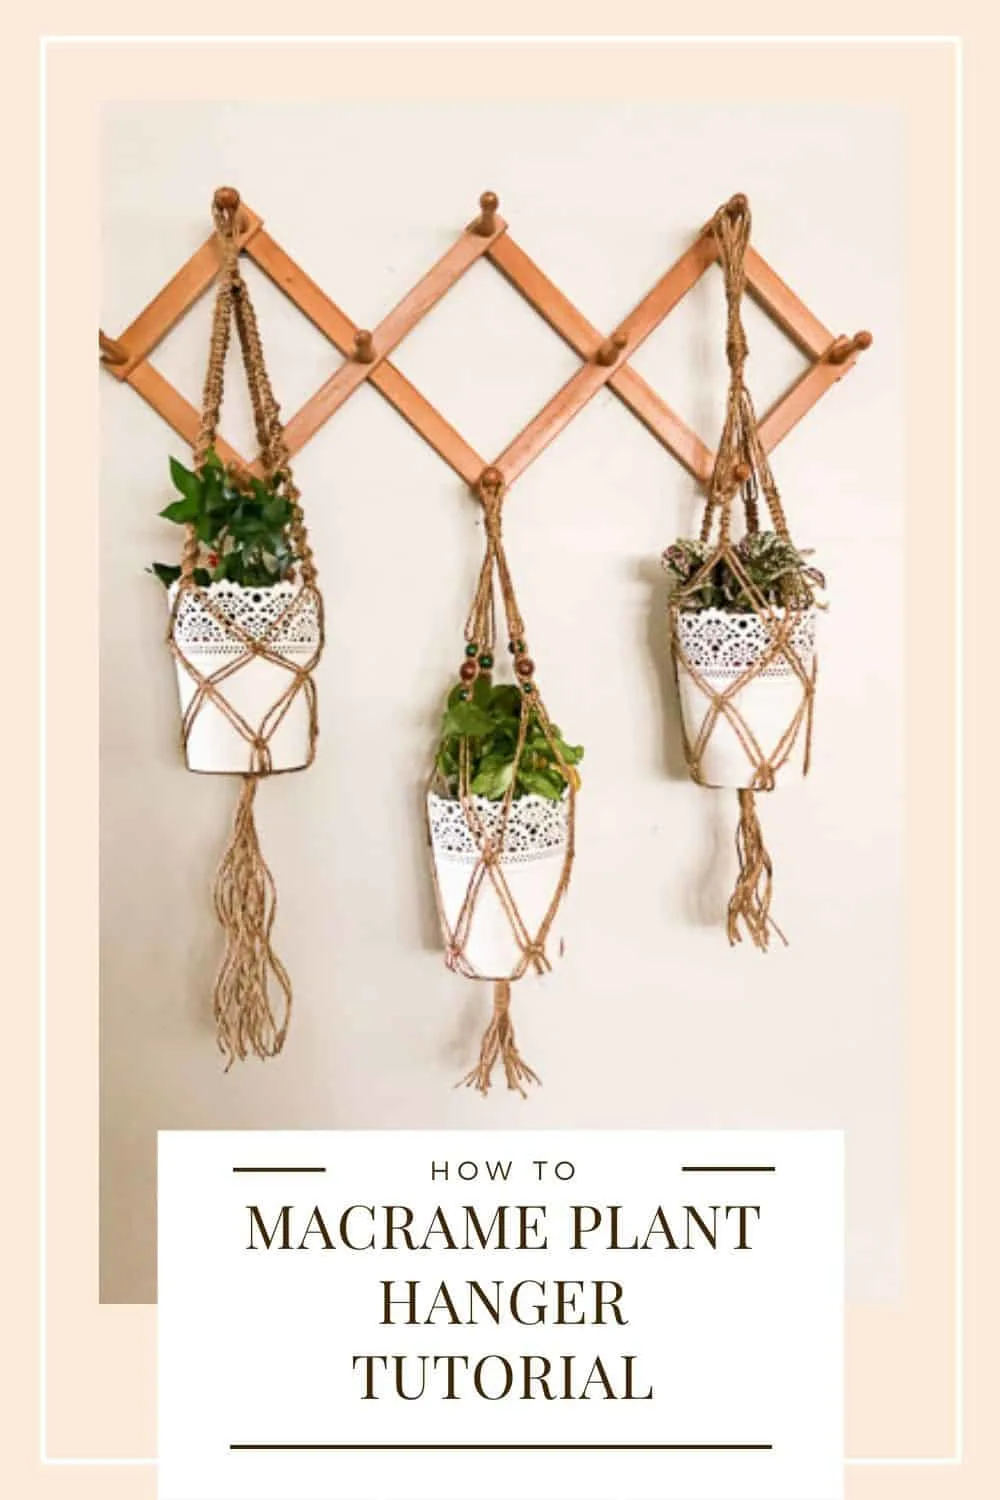
Plant hangers are all the rage right now! And why wouldn’t they be? They are absolutely gorgeous. So I made a couple for myself and wanted to share the macrame plant hanger tutorial with you.
DISCLOSURE: This post may contain affiliate links. If you purchase items through my links I may earn a commission. You can find our full policy here. Thank you.
I found a bunch of great videos on how to make the basic macrame knots, so I’m not going to reinvent the wheel here. You can check out this tutorial if you need to know how to make square knots or spiral knots (the only two I use in this tutorial).
I know at first macrame can seem intimidating. But if you used to make friendship bracelets, I promise you that you can do macrame!
I was very intimidated before getting started. But once I started, it was very easy to get the hang of.
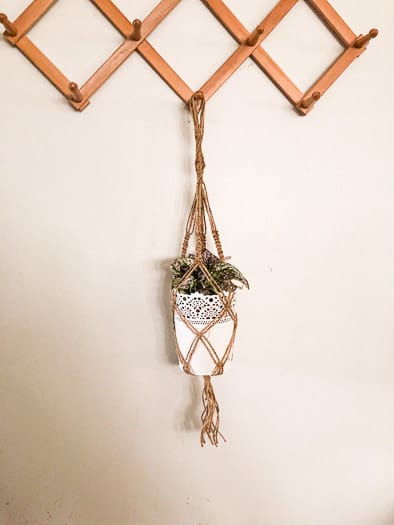
I made three different macrame plant hangers using just two knots. I used twine because I already had it on hand, but you could definitely make the same hangers with macrame cord.
These would make such great gifts! Or you can be greedy and keep them for yourself, like I did!
Macrame Plant Hanger Tutorial
To make all of these macrame hangers you’ll need to start out with eight strands of rope. I quadrupled what I wanted the final hanging to be.
Once you have all eight strands, you’ll fold them in half to get a total of 16 strands. Knot your strands.
To make a square not you’ll work with four strands at a time. Each hangers has 4 arms to hold the planter, so that’s why you need 16 strands.
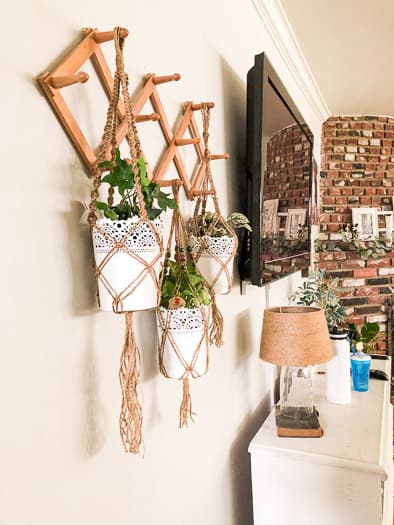
For all these hangers, I’m using Ikea pots. You might have to alter your adjoining square knots slightly depending on your pot.
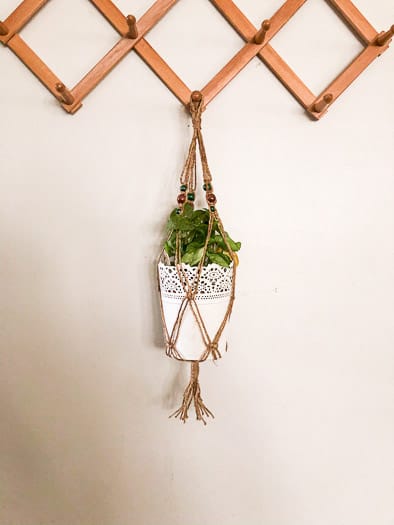
Straight and Twist Hanger
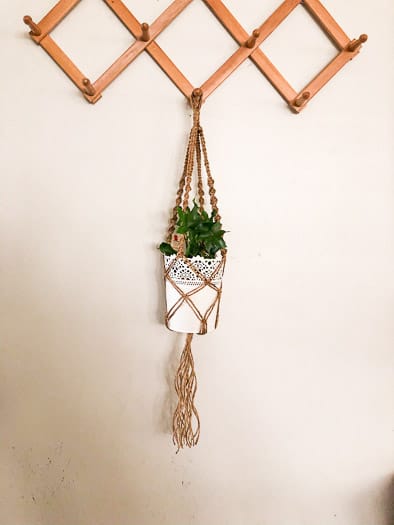
The first hanger I made is 31″ without the pot. Once you put the pot in you lose a couple inches making this hanger 28 inches.
I created the top loop at 2″ and then did a wrap knot of 2″.

I started off immediately after the wrap with a square knot and did those until I had 4″ of square knots. Then I switched to half knots, and did those, to get the twist, until I had 6″ of square knots.
I did that on all four sides. Then you’ll connect two separate strands together using a square knot. Take two strands from one knot and two strands from an adjacent knot and use a square knot to join them together.
This is how we will create the pocket for the pot. I made my first adjoining square 2″ from the end of the half square knots.
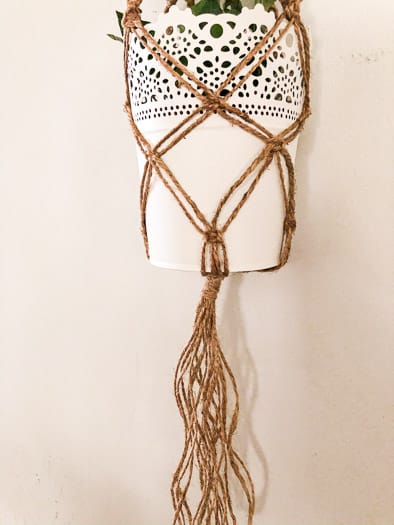
You’ll do the adjoining square knot two more times. One 2″ from the first, and the next 2″ from that. Then you can wrap knot the end. Put the pot in first, then wrap knot underneath your pot. I left 9″ of fringe on the bottom to get the length I wanted.
Beads Hanger
This is the easiest of the three hangers and doesn’t require many knots. Just some beads. I used three beads on each of the four sides.
The total length of the hanger is 23″ without a pot and 20″ with a pot. The loop on this one is 1″ and the wrap knot is 1″.
I measured down 3″ from the wrap knot and started my first square knot. Then I put a bead, another square knot, bead, square knot, bead, final square knot. The beaded section is a total of 2″
Measured 5″ down from the beads and did my first adjoining square knot. The second adjoining square knot 3″ from that, and the last one 2″.
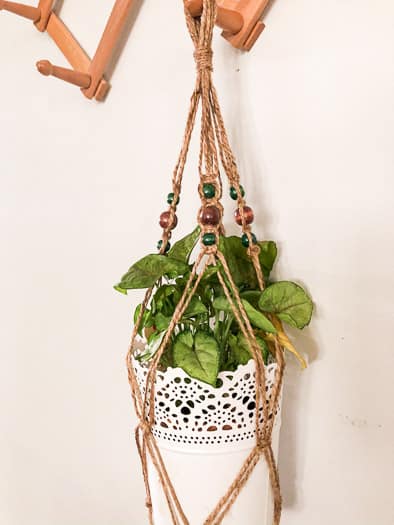
Stick your pot in and then create a 1″ wrap knot. I left 3″ of fringe.
Twist Hanger
This twist hanger is probably my favorite of the three hangers. I don’t know why, but the twist just makes me happy. I think it’s because it reminds me of friendship bracelets back in the day.
I started with a 3″ loop and went straight into the twist. I did it a little different than the other two though. Instead of using only four strands, with two in the middle and two doing the tying; I used all 16 strands. I left 14 in the middle, and still had two doing the tying. This creates a thick center spiral knot.
To create the twist you do half square knots. I did those for 3″. Then, I started to separate the strings into the 4 different sections. I measured down 3.5″ and started square knots for 2″.
I should have done a little more because it’s a tight fit for a plant. But I’m still happy with it.
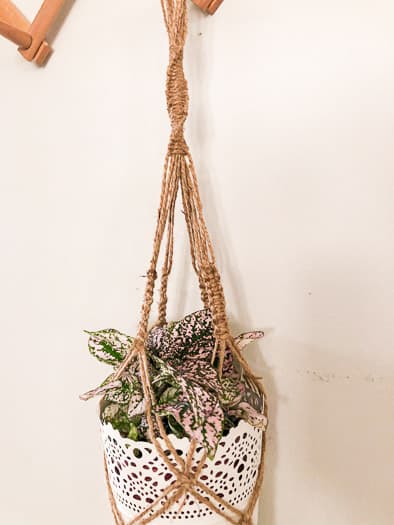
From the square knots, I measured 3″ then did the first adjoining square knot, 2″ from that to the 2nd, and 2″ from that to the third.
Stick your pot in and then create a 3″ wrap knot. I left 4.5″ of fringe.

Macrame Plant Hanger Tutorial
How to make twine macrame plant hangers. You can definitely use macrame cord as well!
Tools
- Scissors
Instructions
- Start with 8 strands of twine. However long you want your final project to be, quadruple it, and that's about how long you'll need each strand to be.
- Fold the strands in half to create a total of 16 strands. Keep room for a loop for hanging and then make a wrap knot.
- To make square knots, you'll work with four strands at a time. Each hanger has 4 'arms' to hold the pot. So you'll do each knot in the same area on each of the 4 arms.
Pingback: 40 Easy DIY Macrame Plant Hangers Ideas & Tutorials
Pingback: 40 Easy Diy Macrame Plant Hangers Ideas & Tutorials - Fresh Diy Home
Pingback: 26 DIY Macrame Plant Hangers Ideas