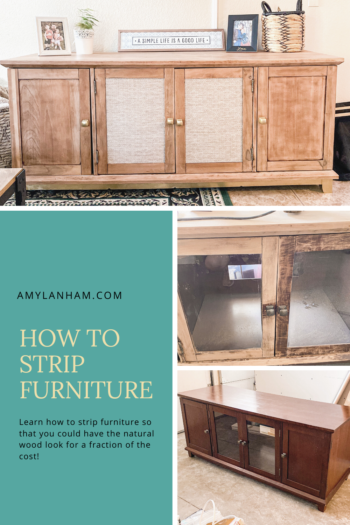
I’m loving all the natural wood look furniture that I’ve been seeing online lately. I can’t afford to buy a piece already done, so I learned how to strip furniture myself so that I could have the look for a fraction of the cost!

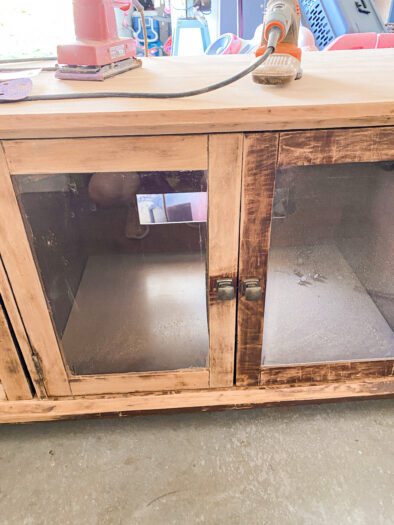
I’ve been looking for a new TV stand for months. I thought I wanted something metal and maybe a little modern. But as I was scrolling Facebook marketplace one day this piece popped up for free!
Facebook Marketplace is one of my favorite places to find furniture. It can take time, and there are sometimes scammers, but I’ve found some great furniture this way. Make sure you follow my tips for finding furniture on Facebook Marketplace.
Now I can’t turn down a good free piece of furniture. It was the right size and I figured I could make it cute. My original plan was to paint it black.
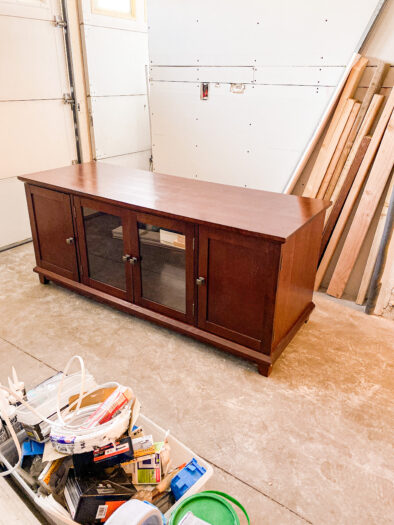
But once we got it home and I knew it was real wood, I envisioned a raw wood TV stand and had to make it happen! I had paint and varnish stripper on hand from a different project that never happened. So that’s what I used.
How to Strip Furniture
DISCLOSURE: This post may contain affiliate links. If you purchase items through my links I may earn a commission. You can find our full policy here. Thank you.
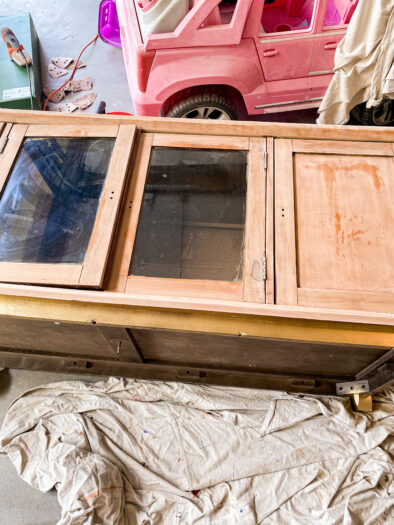
I started by slathering the paint and varnish stripper thickly all over the piece and quickly covering it with Saran Wrap. Lucky for me I had purchased 2 giant rolls of Saran Wrap years ago for the Saran Wrap Christmas Ball game. So I had plenty for this project.
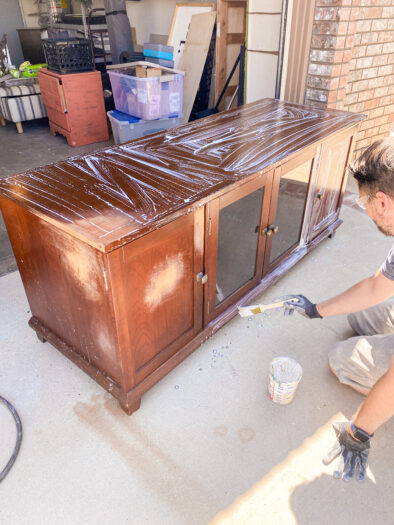
I left it to sit for about 45 minutes then started striping it off. First, I used a putty knife we already had. It worked but not well.
After a trip to Lowe’s, I got an angled putty knife, and a plastic paint stripper tool. The plastic tool didn’t work at all. I would not recommend it at all for how to strip furniture. I had the most luck with the metal putty knife with a sharp angled edge. It worked much better.
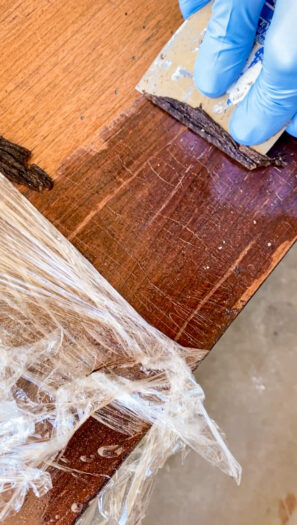
I couldn’t get all the stain off, but I was at least able to get the majority of the top shiny layer off. Then I started to sand.
All I could find was the 60 grit sand paper for my mouse sander. 20 or 40 grit would have been better. The most expensive part of this project was the sand paper.
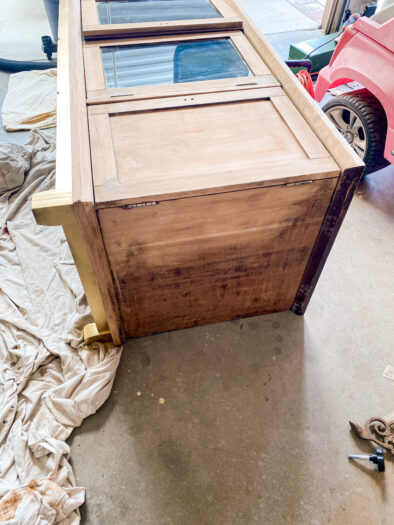
After sanding for a couple hours over multiple days, I had finally stripped it all the way down to the raw wood. Once all the stain was removed, I sanded with 180 grit and then 240 grit to smooth down the wood.
Preserving the Natural Wood Look
After the wood was really smooth, I decided to seal the piece with polyurethane. I chose to polyurethane my piece because I wanted to make sure it would stand up to my little kids. I started with polyurethaning one side and letting it dry for 20-30 minutes to make sure it wouldn’t darken the wood too much.
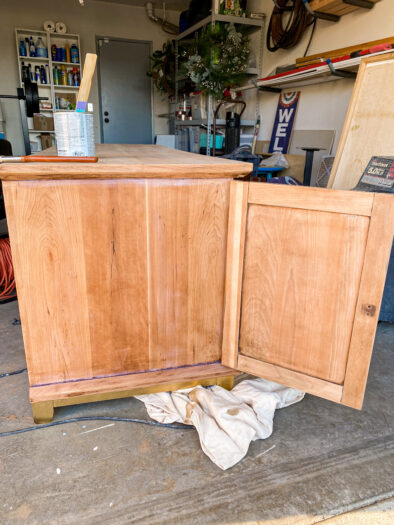
In the picture above, you can see the left side of the piece is polyurethaned and the right side open door is not. It’s not too much of a difference so I decided to keep going. The tv stand being well protected was more important to me than the slight darkening of the wood.
Finishing Touches
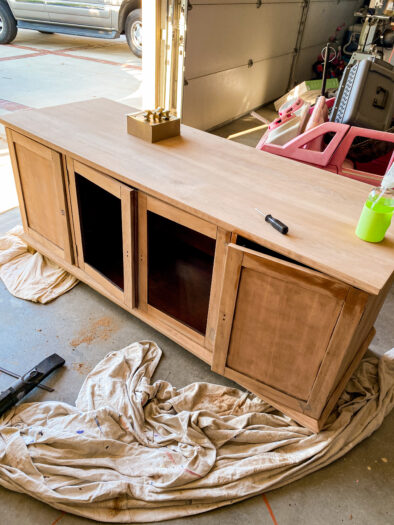
For the handles, I just spray painted them gold with some spray paint I already had. I also spray painted the bottom of the TV stand gold to. It was a hard area to sand, so I just painted it.
The glass in the cabinet was in good condition, but I didn’t want to be able to see clutter inside the TV stand. We don’t have any tv equipment that needs to go inside, so we keep our kids games in the TV stand. While they’re organized, it’s not the best.
So to keep the clutter hidden away, I decided to cover the glass. The glass popped out easily by taking the rubber gaskets out from the back. I bought placemats from Ross, then cut them to just a little bit smaller than the glass.
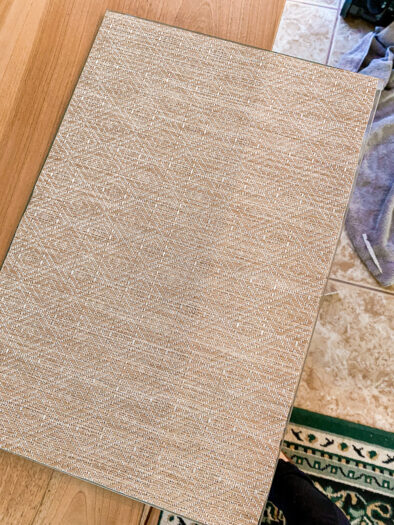
I put the placemat on top of the glass and then sandwiched it into place in the cabinet. Put the gaskets back in and I was done!
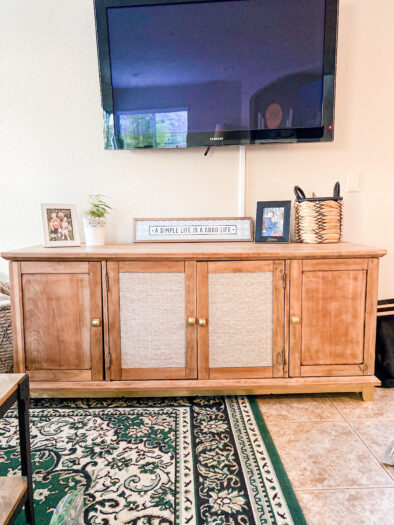
While this project was a total pain in the butt because of the amount of sanding involved, I could not be happier with how it turned out! I don’t think I’ll be using the paint stripper again anytime soon, but the piece looks amazing and was well worth the effort.