
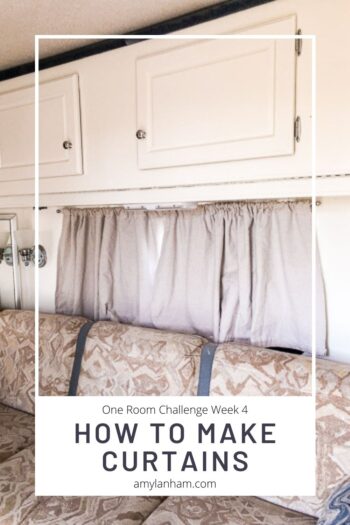
Week 4 of the One Room Challenge is upon us! Last week was all about me learning how to make curtains for the trailer. We actually finished a lot in the trailer last week.
Week 1 / Week 2 / Week 3 / Week 4 / Week 5 / Week 6
What We Finished
When we left off in Week 3 I was able to finish painting the kitchen and living room area of the trailer. But I wasn’t able to do the cabinet doors or the lower cabinets.
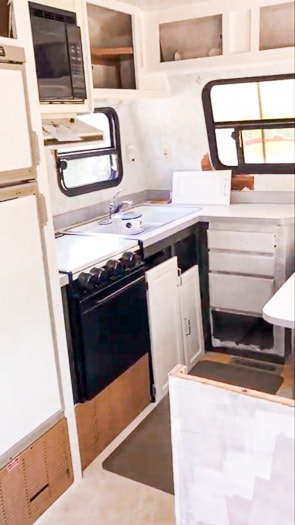
I decided to hold off on painting the lower cabinets for now. I can’t decide what color I want them. The color I chose in our mood board didn’t end up working. So I have to choose a new color.

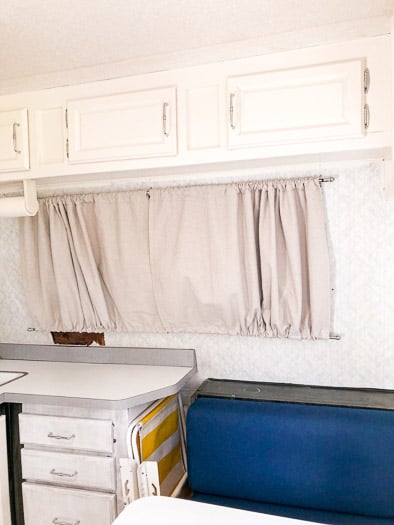
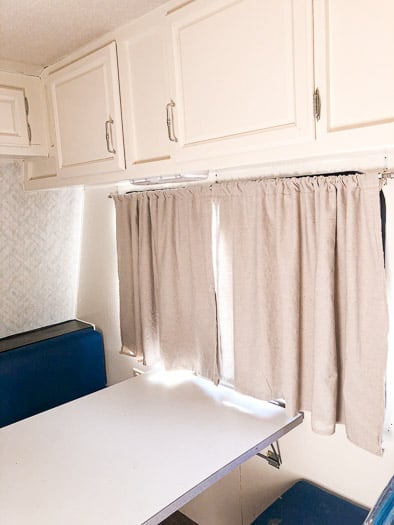
I was able to finish painting all the cabinet doors though and got those up. They look fantastic and it’s such a relief to be finished with that part of painting!
DISCLOSURE: This post may contain affiliate links. If you purchase items through my links I may earn a commission. You can find our full policy here. Thank you.
John put up the LED lights we bought and they look fantastic! The old one’s were really yellowing and stood out with the new paint. The new lights are also so much brighter, don’t use as much electricity, and don’t run as hot.

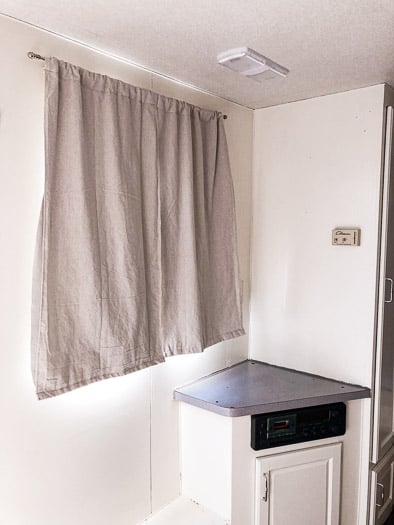
I also was able to make the curtains for the 5 windows in the front half of the trailer.
How to Make Curtains
I’ve never made curtains before. I don’t actually really sew. But I wasn’t to give it a go!

I used for the curtains. Drop cloth is cheap and easy to work with, it also cleans up nicely.
I prewashed the drop cloth before making the curtains. Now I know it won’t shrink and I can wash the curtains anytime I need.
I used the old curtains as a template. They were lined with some nice black out fabric. I reused that black out fabric by ripping the seam in the old curtains to detach the black out fabric.
Sewing the Curtains
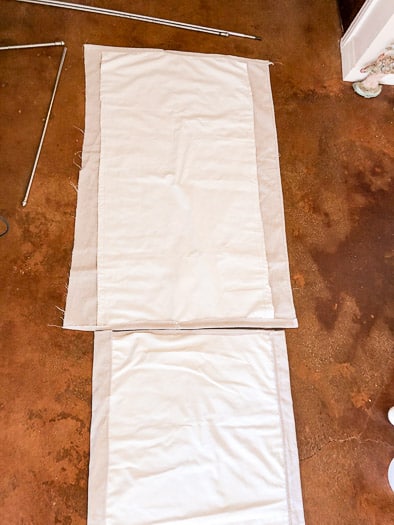
First, I laid the old curtain on top of the drop cloth, then cut out the drop cloth accounting for my seams.
I wanted the pockets for the rods to be bigger than the old curtains, but I cut a couple a little too short. It ended up being fine, but I should have accounted for a larger seam.
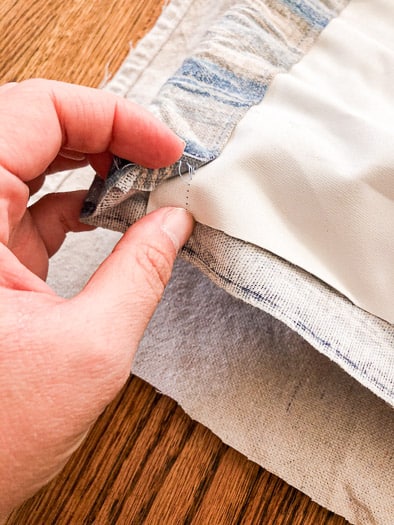
Once the drop cloth was cut out, I cut the lining to size as well. Then, I laid down the old curtain, laid the drop cloth on top, then the lining and pinned the sides in.

I used the old curtain as a template to make sure I wasn’t going too short. Then I would sew the sides, lay the new curtain back on top of the old and pin the top and bottom, then sew.
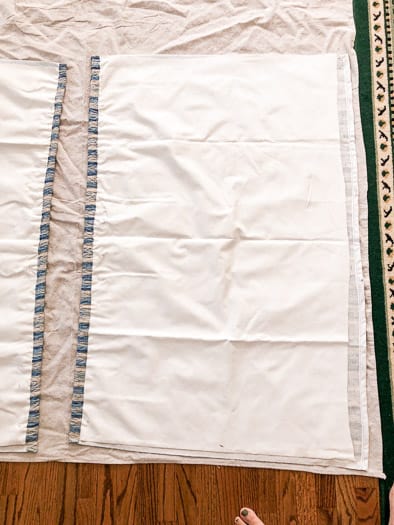
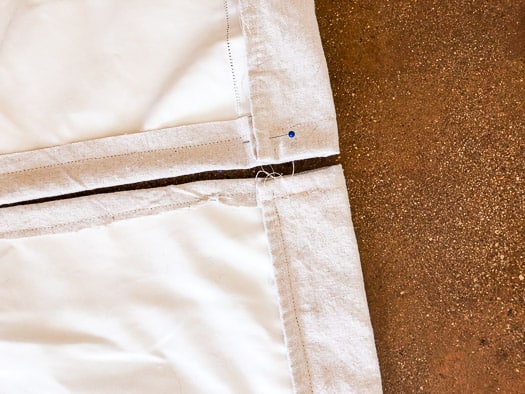
For the second curtain, I used the new curtain I had just made as a template. New curtain goes down, then drop cloth and lining for second curtain, pin sides, sew.

Then I laid the curtains next to each other to make sure the height was the same, pin top and bottom, sew. I figured it was more important for the height to be exact than the sides, since when the curtains are hanging next to each other, you’ll be able to tell if one curtain is too long or short.
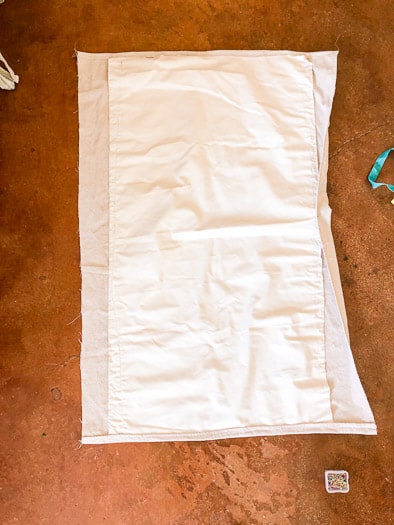
Overall this worked perfectly. Like I said above, I made two curtains just a tad too short. But I was able to move the brackets down a bit and it’s fine!
Decisions We Made
We finally picked out the flooring! This is the I picked up this week. We wanted dark flooring because we figure they’ll be dirt in the trailer and sand because we plan on doing lots of beach camping.

This way the dirt will blend in with the floor. So we went darker than we were originally expecting.

I also ordered this and this wallpaper. This is different wallpaper than in my original plan. I changed it because the other wallpaper I chose was expensive and I didn’t love it. I think this one will go better with the white we chose too.

What’s Left?
We need to finish the floor, wallpaper, and backsplash. We’ll be working on the floor this week, be sure to follow along on Instagram!
We also have the shower to finish. John has to work on some mechanical things and we have to decide on the paint for the bottom cabinets.
Then it’s all the decor! I might be making some rugs, and I shopped my moms house for decor so I’ll probably have some mini decor DIYs!
Check out the Other ORC participants
Don’t forget to check out the other blogger’s room transformations.
Pingback: Reversible Purse from Sheet Bags - Crafts and Home Decor