
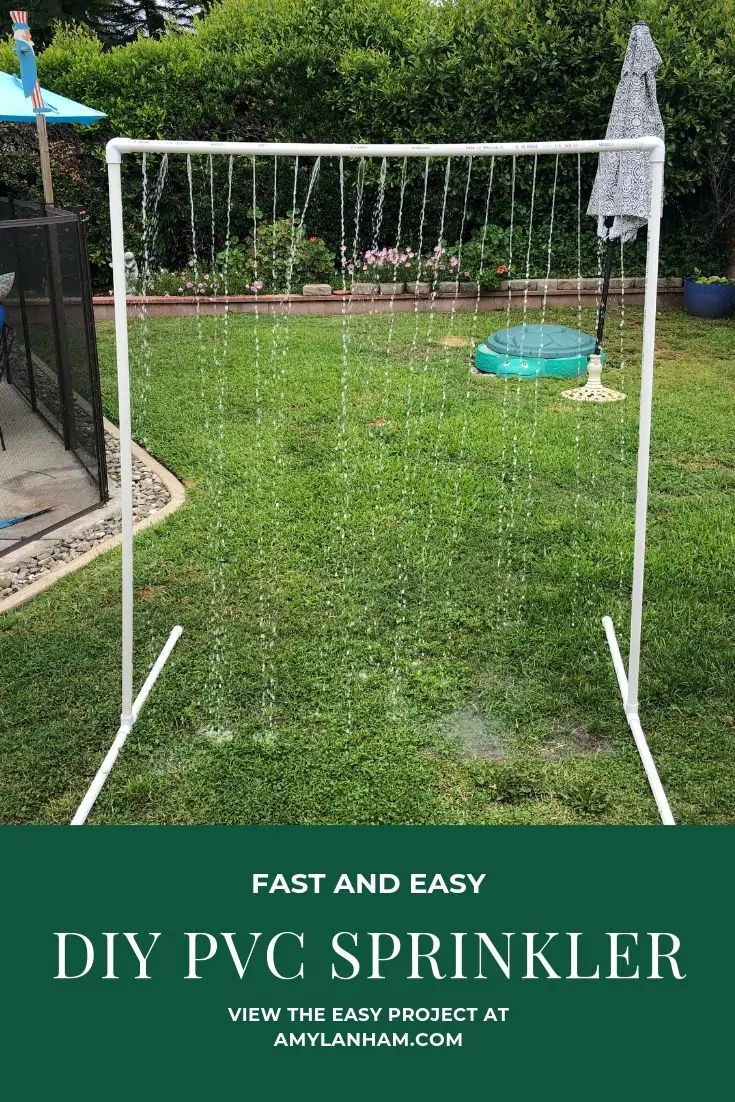
After making the water table for the kids we decided we needed some other water toys for the kids. So we made this DIY PVC Sprinkler.
DISCLOSURE: This post may contain affiliate links. If you purchase items through my links I may earn a commission. You will not pay more when buying a product through my link and you do not have to use my links. You can find our full policy here. Thank you in advance for your support.
This project is probably the easiest project ever! You only need PVC, a drill, and PVC cutters. Seriously that’s it.
We decided not to glue the PVC together so that it would be really easy to break down for the winter.
DIY PVC Sprinkler
You need 3/4 inch PVC pipe. 3 end caps, 2 t’s, and 2 90 degree elbows. You also need a hose connector.
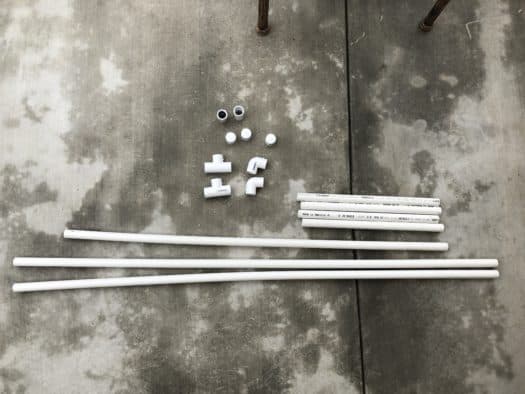
The hose connectors are not located in with the other PVC. At least at my Home Depot, they were located in with the sprinkler heads.
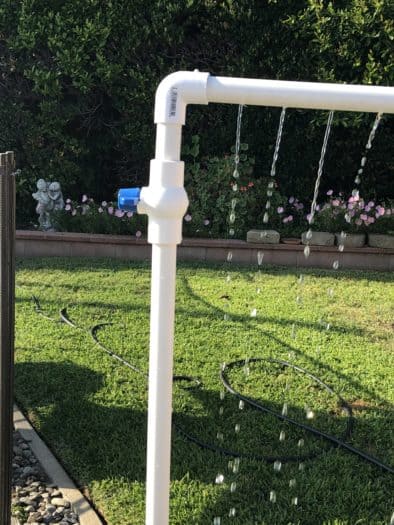
The side pieces are 5 feet each, the top portion is 4 feet with holes drilled every 2 inches with a 1/8 drill bit. For the feet there are 4 18 inch pieces.
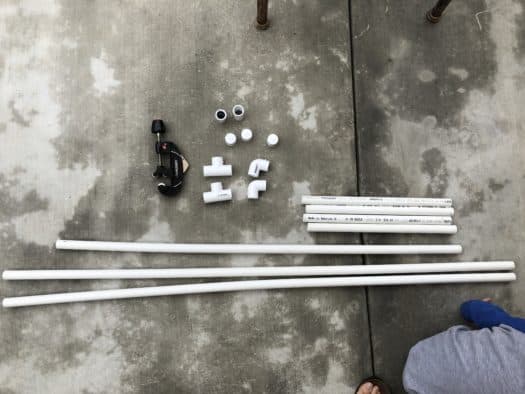
Use the t’s to attach the feet to the sides and then the elbows to attach the sides to the top with the holes drilled. Point the holes down.
Put the end caps on the ends of the feet and then your hose connector. Connect your hose, and turn it on!
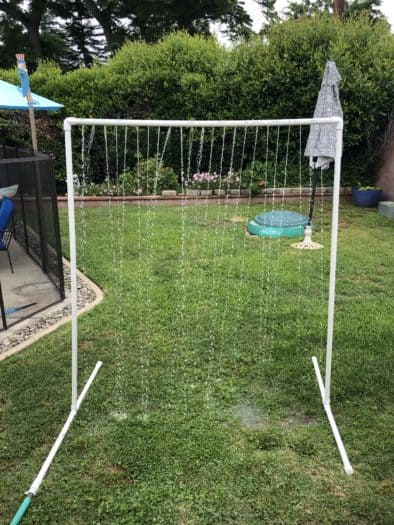
That’s it! Seriously, the easiest project and the kids have so much fun with it!
We turn the water on really low so that it’s just a dribble. This way it doesn’t create a flood and the kids can run through it.
Love this idea and I already had everything on hand….but what hose connector did you buy and use? Trying to figure out how to tightly secure the PVC and hose connector.
It’s actually called a hose adaptor. I see this 1/2″ one at Home Depot: https://www.homedepot.com/p/1-2-in-PVC-Hose-Adapter-10118H/100373234 but I know I used 3/4″ PVC so that can’t be it. They also have this 3/4″ adaptor https://www.homedepot.com/p/3-4-in-MNPT-x-FHT-PVC-Swivel-53364/100197786. I can’t find the exact one I used online.
Did you really use 18′ of pvc for each side at the bottom or is it supposed to be 18″?? It doesn’t look quite that long, but I know pictures can look distorted. We’re going to make this for this summer!!
That was a mistype! It is supposed to be 18″. I will fix it now, thank you!
Pingback: DIY Mud Kitchen - Perfect Outdoor Activity - DIY with Amy
what was the cost? I am thinking of adding this to an event for student ministry but we have a budget!
I don’t remember exactly, but I would imagine making it now would be around $30, given the current cost of PVC.
Where did you connect the water hose connector? I couldn’t tell from the picture and got confused by the picture with the blue thing, so sorry!
We attached the water hose connector to one of the bottom leg supports. The rest get capped so the water doesn’t leak out.
What is the blue lever on the last photo? I don’t remember seeing that listed in the materials.
It’s a ball valve to turn off the water to the sprinkler without turning off the hose.
Do you have any info on how to add one of those in? We made the original several years ago and love it but I’d definitely be interested in adding in a ball valve to have better/easier control too. And do you know how it works if not everything is glued together? We wanted to be able to take ours apart for the winter for easier storing so each of the long pieces comes apart (but the joints are glued on, and we notice that if the water pressure is too high the pieces burst apart.
You can add in a ball valve at any time. Just cut the PVC where you want to add in the ball valve and glue it in between both pieces. We also didn’t glue everything together so we could store it and sometimes it did come apart. Having the ball valve helps with being able to manage the water pressure. If you don’t want it to come apart at all, it will have to be glued.
Pingback: 15 Fun PVC Sprinkler Ideas You Can Build Yourself
Pingback: 15 Efficient DIY PVC Sprinkler System Ideas for Your Garden