
When I start a project, it has a tendency to snowball. Our motorhome redo was kind of like that. One thing leads to another and I end up coming up with more and more projects. That’s how I ended up making this DIY key holder.
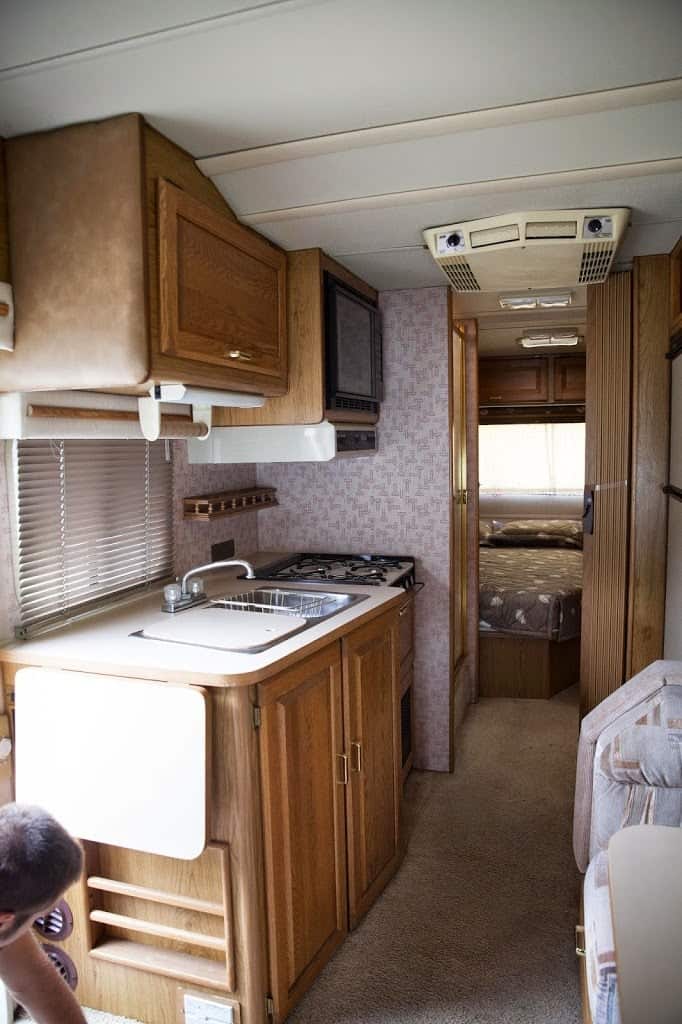
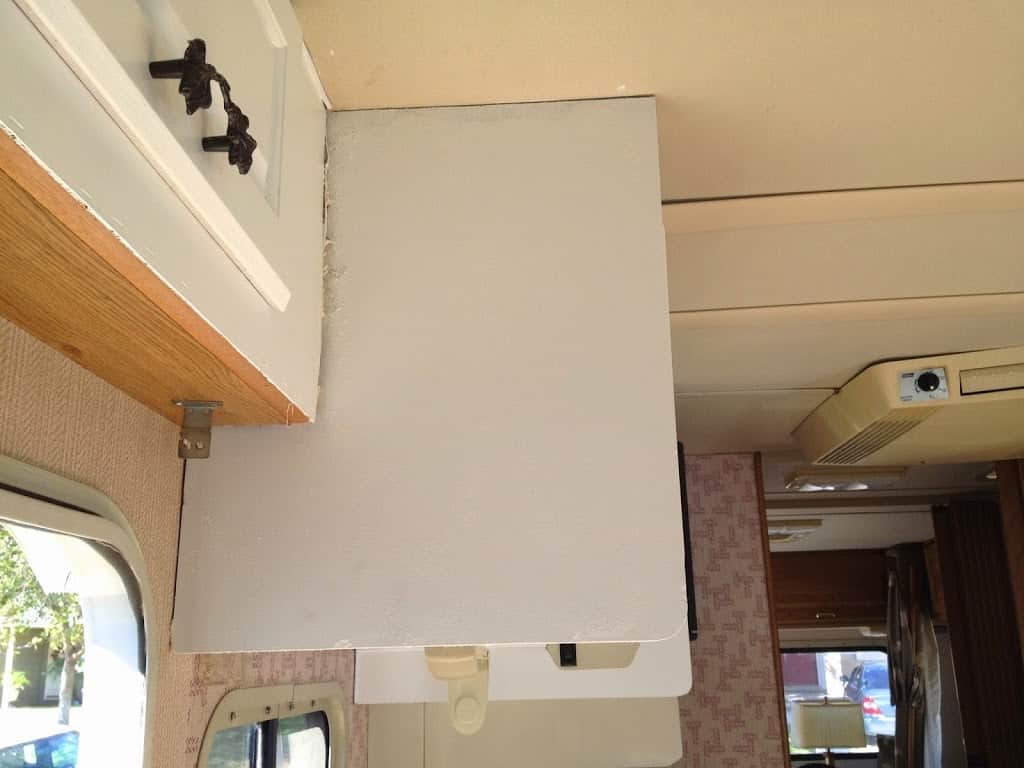
Right inside the door, to the right hand side was a weird puffy piece of leather. Originally I hadn’t planned on taking it off. But after all the doors were taken off and I had started priming, I brought my mom in to show her my progress. She suggested that I take that piece off so that I could hang our keys there. Underneath it was just plywood, so I painted it like the rest of the motorhome.
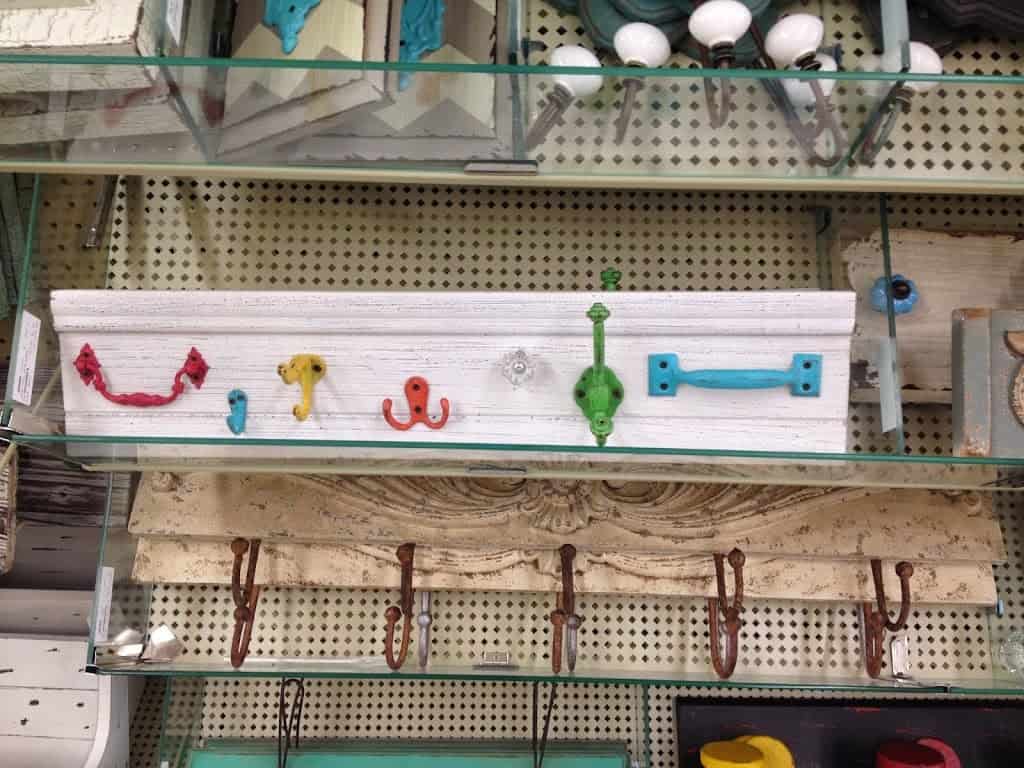
Now all I needed to do was find a key holder that I liked. I fell in love with this one from Hobby Lobby. It was only $30, but it was way too long for the small space I had.
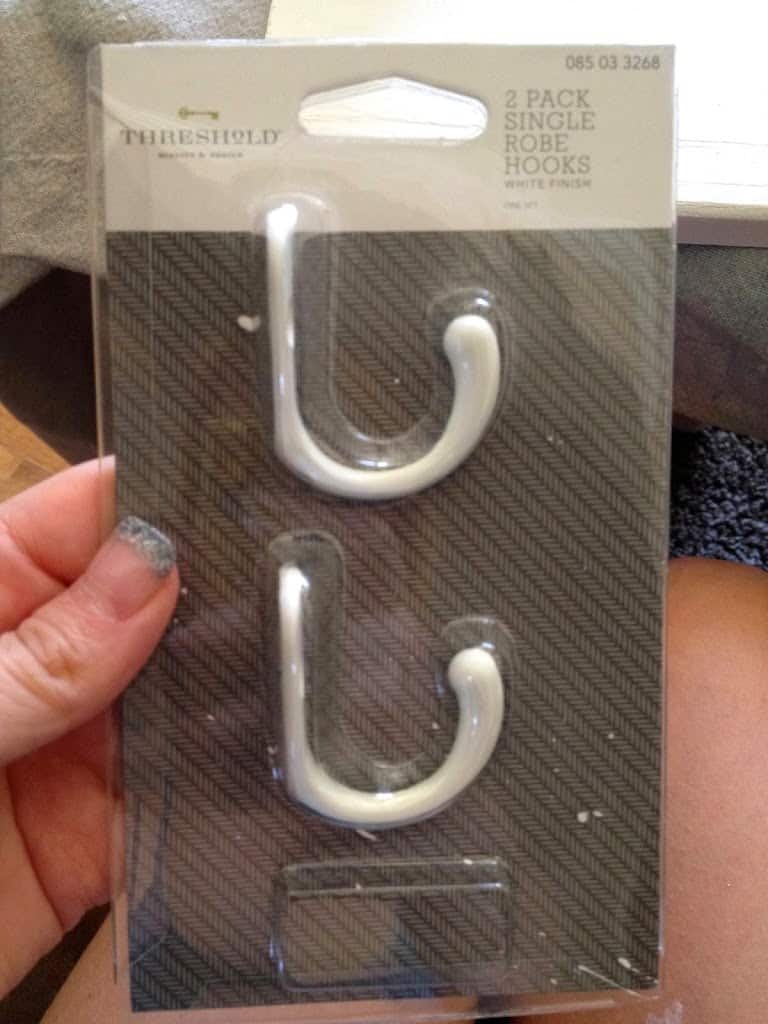
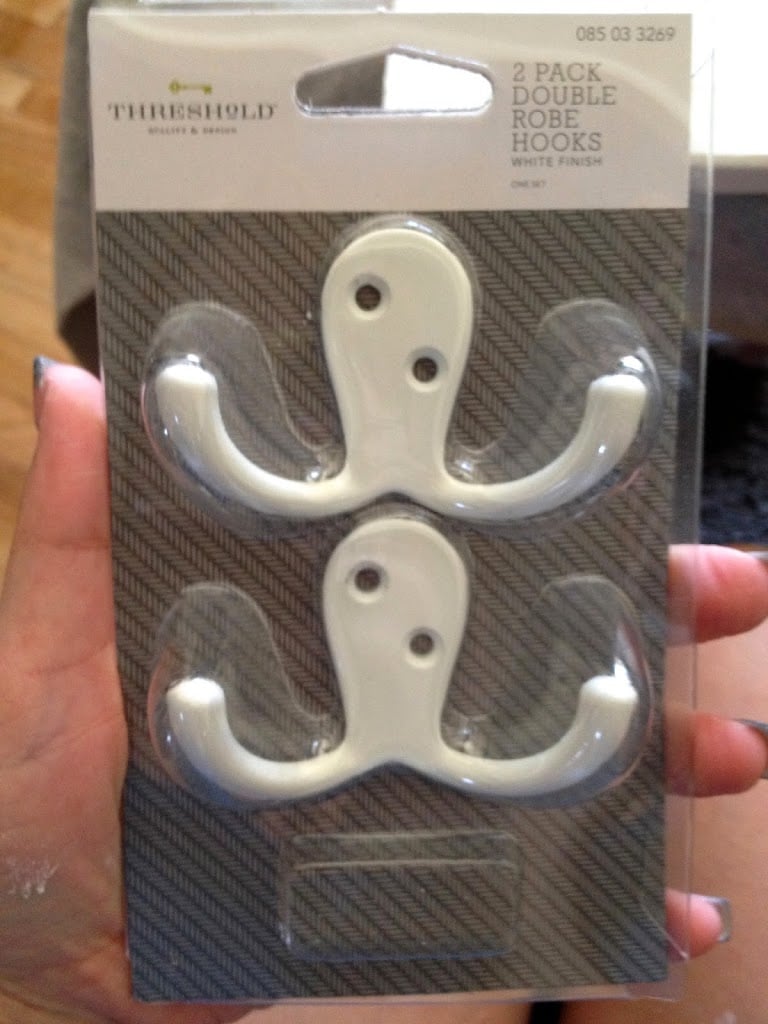
Instead, we went to Lowe’s and bought a piece of wood for $8 and then found these hooks. There were two in each pack for $3 per pack. So the whole project ended up costing me around $14, which in the long run didn’t save me much money (since I could’ve used a 40% off coupon at Hobby Lobby and gotten the above one for around $17). But I was able to cut the wood to perfectly fit the space I had (I made the wood about 11″) and I had extra wood to make one for the house too!
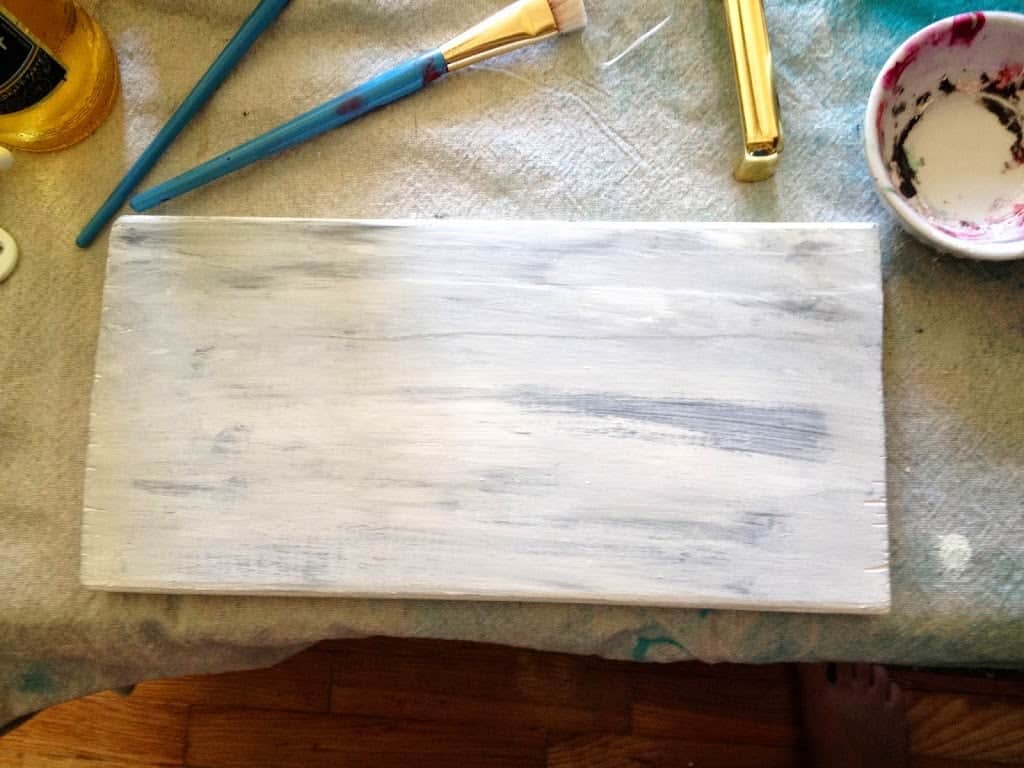
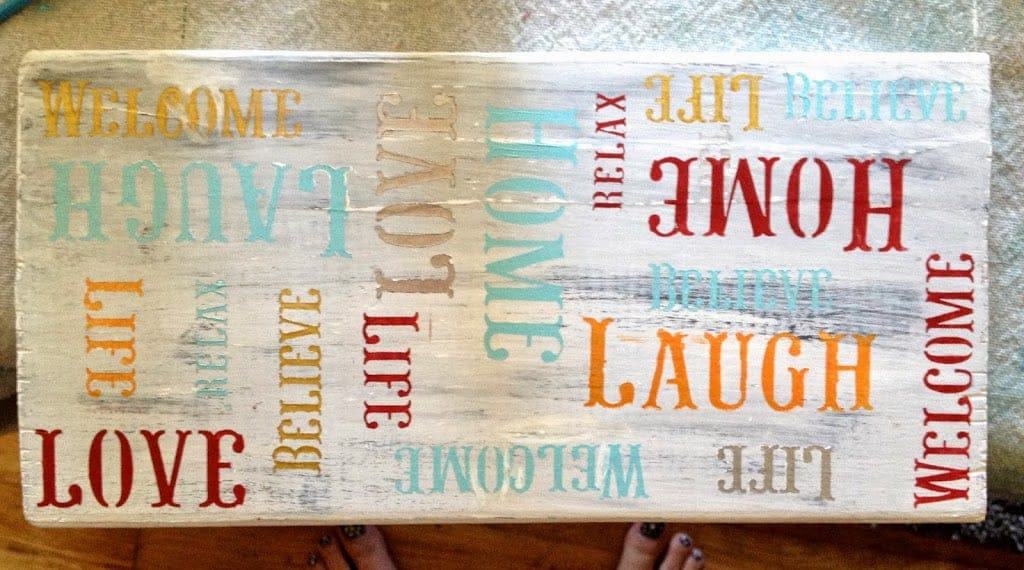
I had acrylic paints at home already, so I didn’t need to buy any. I painted the wood white and than used some black paint and a paper towel to make it look “weathered”.
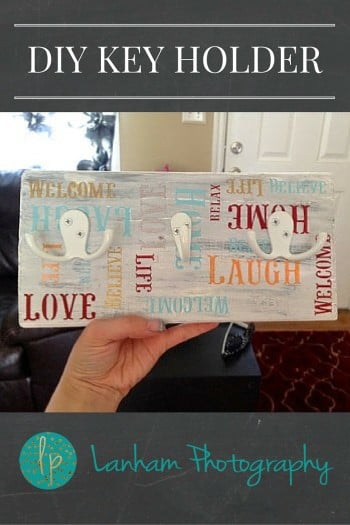
I wanted to paint the hooks all colorful, like the one from Hobby Lobby, but I remembered I had these stencils from a different project and my husband liked that idea, he thought it would match better.
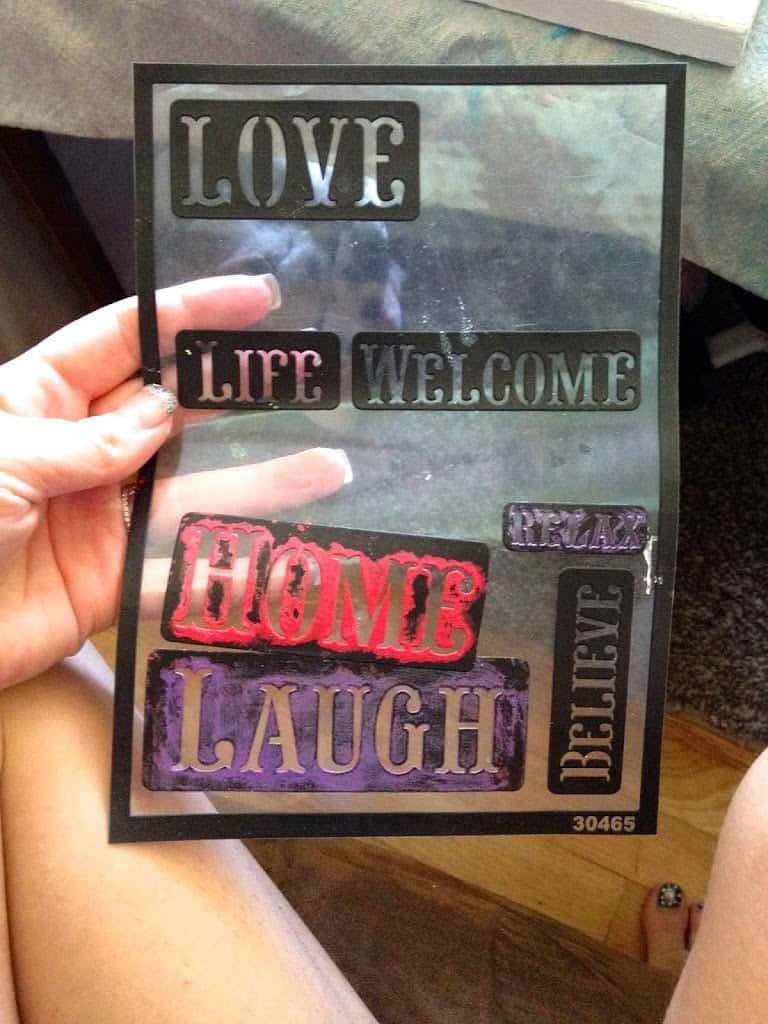
I positioned the words all over the piece of wood and used red, blue, orange, gold, and silver. I was only going to use red and blue, but quickly realized I needed more colors. I didn’t really plan out where the words would go, I just kind of made it up as I went along and tried to make them as straight as possible. I love the way it turned out.
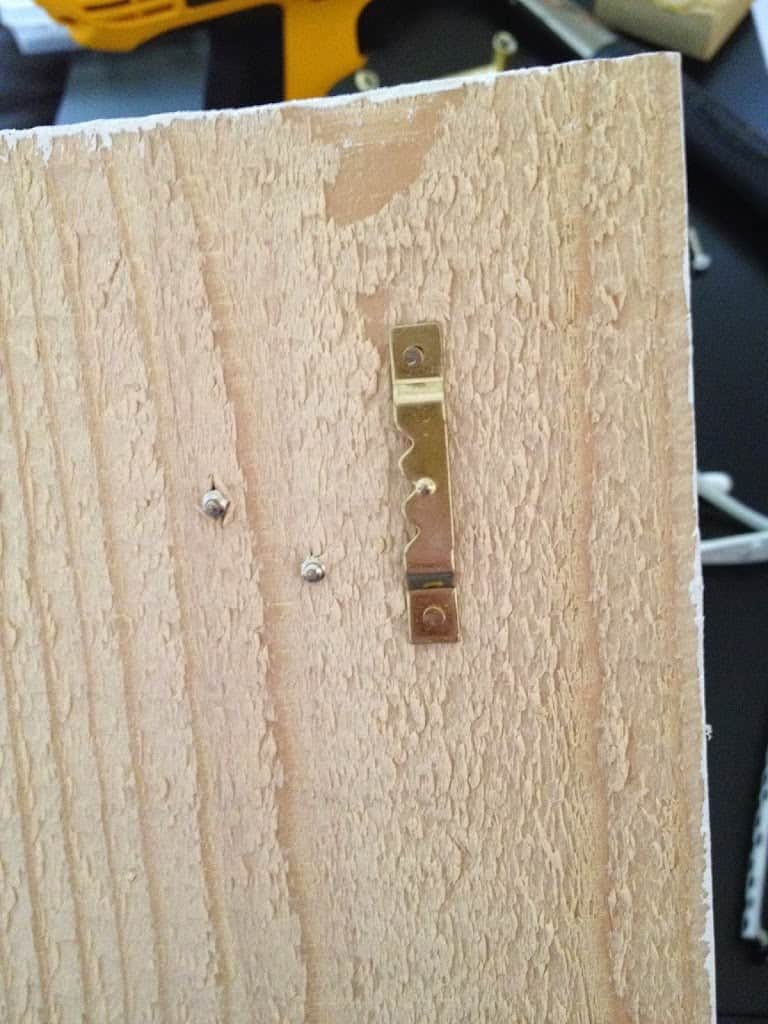
I wanted to just screw it into the motorhome, but my husband veto’d that. So I put two of these picture teeth on the back of the wood. I already had some at home, from and Ikea picture hanging kit we had, so I just nailed them into place. I put them down from the top quite a big so that I won’t have to worry about seeing any of the nails from the top.
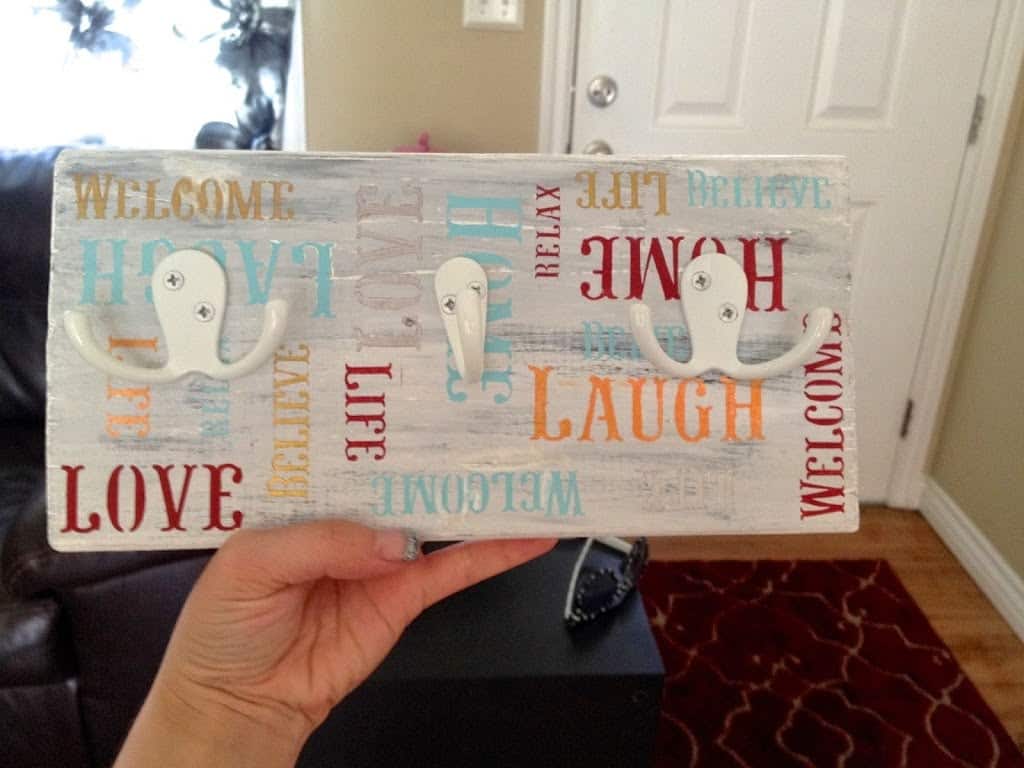
I then added the hooks on. I just kind of eyed the hooks to make sure they were straight. I’m not really good at measuring and making sure, so the middle one wound up a little crooked but its all good, it adds a rustic charm!
Now all I have to do is hang it up in the motorhome and hang our keys on it!