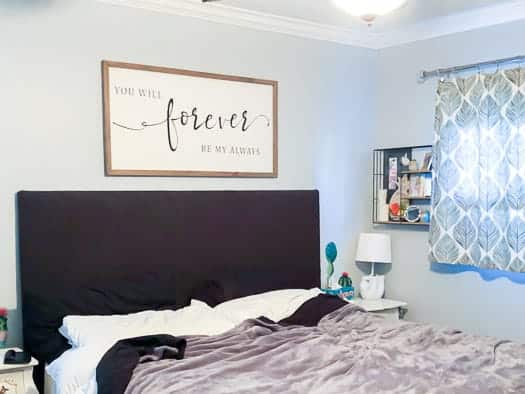
When my husband and I first got married I really wanted a fabric headboard. We didn’t have a ton of money, so we chose to make a DIY fabric headboard. It served us for 8.5 years until we redid the headboard.
When we redid the headboard, there was nothing wrong with it, we just wanted something new, a geometric headboard and ended up being able to reuse the original. So this headboard will be sturdy for years and years to come.
This fabric headboard is so easy to make. The hardest part is picking out the fabric! You could change the fabric as frequently as you want though, so it doesn’t have to be the fabric you’ll love forever.
DIY Fabric Headboard
First, measure your bed. For a king size mattress you’ll need a 3/4 inch plywood 4 feet x 8 feet. Then a 2×4 at 8 feet length.
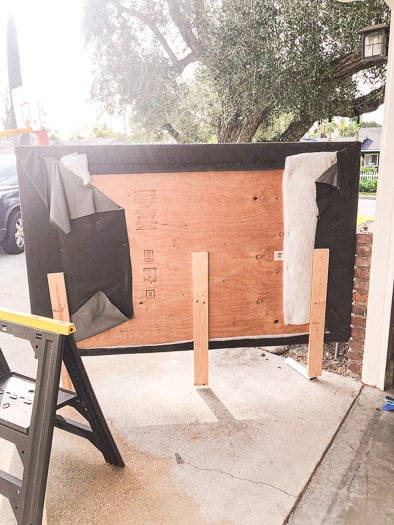
To get the headboard to sit at the right height, use the 2×4 as legs. Cut it in half, then attach those 2×4’s to the back of the 3/4 inch plywood at the height you want it to sit.
Get three yards of fabric and three yards of batting. Sandwich the batting between the fabric and the plywood board. Then use a staple gun to staple the fabric and batting to the back of the plywood.
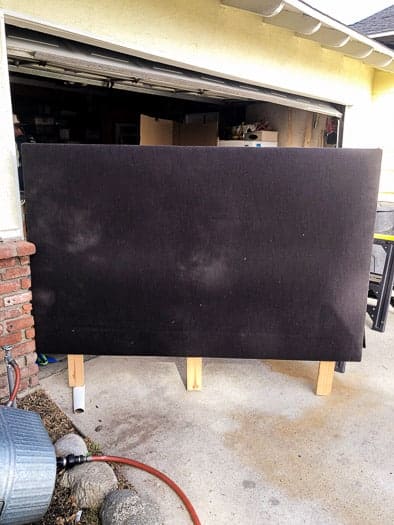
That’s basically it! You can attach the headboard to the wall, to your bed frame, or just sandwich in between your bed and the wall. That’s what we did.
The headboard isn’t going to go anywhere when it’s sandwiched between the bed and the wall. Especially since it has the legs, so it doesn’t have to be attached to anything.
Like I said, this was our headboard for 8.5 years, we recently changed it and are still using the same general structure. You can read all about how we changed it here.