
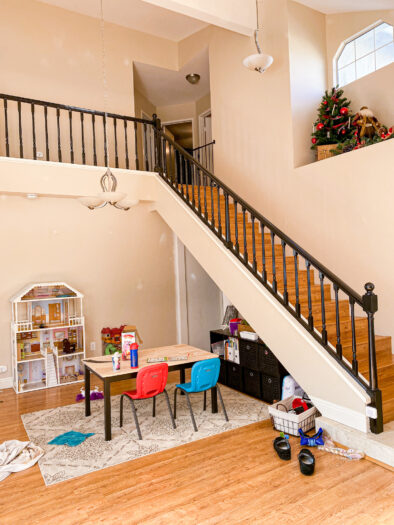
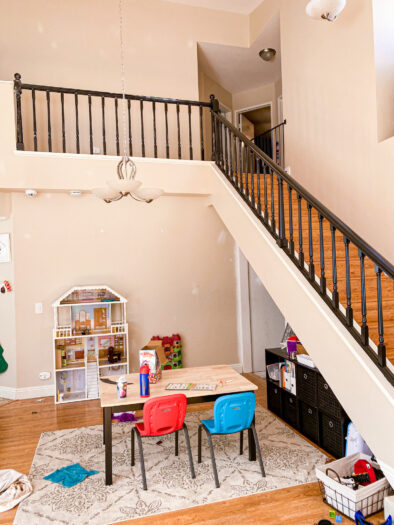
I painted my stair railing!! I almost didn’t do this project. It sounded daunting. But after researching, I figured out how to easily paint a stair railing.

I’ve had this black paint for months. It was one of the first things I bought when we moved into the house. I knew from the moment I stepping into the front room that I wanted a black stair railing.

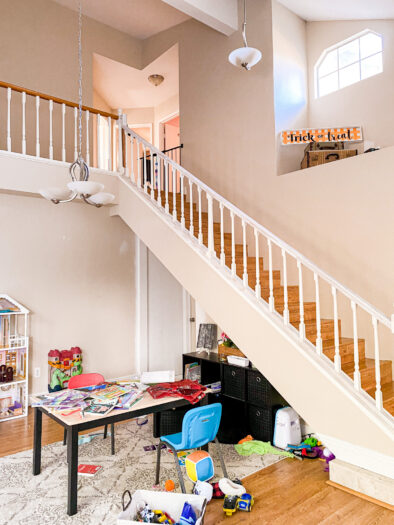
At first, I looked into getting a new stair railing. This one isn’t up to code, the balusters are a little too far apart. But it was more than I was willing to spend at this time.
So I figured a fresh coat of paint would be my best option. The wood on the top and bottom just looked dated and way too orange. I wanted to update the railing.
The plan was to just paint the orange wood, but after living with the railing a couple months, I decided to paint the white balusters too. With two young kids, the white always seemed to have black smudges on them.
So I’m glad I waited a few months before diving into this project. It wouldn’t have been such a big deal to paint the balusters and wood separately but it’s was nice to get it all done at once. Plus, no taping!
How to Easily Paint a Stair Railing
My biggest worry when it came to painting the railing was sanding. Was I going to have to sand the whole railing? And how much clean up would be involved?
I was also really worried about keeping my kids from touching the railing for long periods of time. I had read some recommend not touching the railing for 24-48 hours. That’s super unrealistic here.
But rather than not do the project at all, I decided that I needed to just try. I mean what’s the worst that can happen?
So that’s what I did. I cleaned all parts of the stair railing really well with some all purpose cleaner. And let it dry really well.
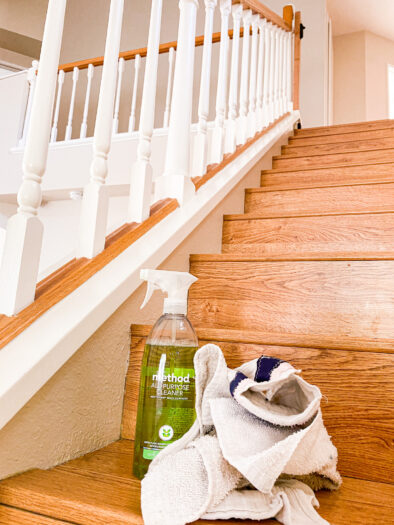
Then I took a sanding block at 120 grit and sanded just the top of the wood railing. I sanding lightly, just enough to take the shine off (which had previously been taken off pretty well with bleach when cleaning one time).
Then I cleaned again for a second time. Making sure to get all the sand and then letting everything dry thoroughly and making sure no one touched it.
Painting the Railing
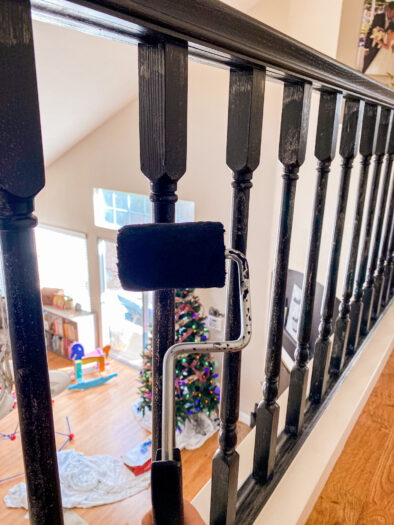
It was a lot of work, so I painted in sections over multiple days. I used my free form brush, a Purdy brush, a small craft brush, and a roller.
I primed just the wood on the top and bottom of the stair railing and let it dry for 24 hours before starting the black paint. I used Tricorn Black by Sherwin Williams in the trim finish. The same back I used in the bathroom and on my fireplace.
But to make sure all my hard work wouldn’t be in vain, I painted 2 balusters first since I was most worried about the paint sticking to those. I let it dry for 24 hours before checking it. I tried scratching it with my nail and felt confident that it would hold.
So I moved on and started painting everything. I would paint until I got tired, wait at least 24 hours and then do a second coat on what I had already done and paint a first coat until I got tired. It took me about 2 weeks to paint the whole thing and 6 total painting session.
I started by painting all the small balls on the balusters with my brush, then painting the bottom and underneath of the railing with my brush. Once I got all the cutting in done, I would paint the balusters with the roller.
The roller helped things to go faster and helped ensure I didn’t have lots of brush marks. I finished by painting the top of the railing with the roller.
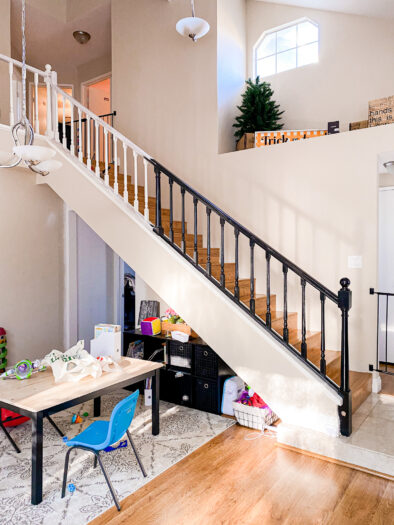
The first coat is splotchy, but the second coat is perfect. It smooths everything out and looks amazing.
I’m so incredibly happy with how it turned out. The black really pops and it’s exactly what I wanted!
Questions
So now for some answers to your questions.
Do I have to sand before painting my stair railing?
Yes and no. If it’s wood, I would sand a little bit, especially the areas that get high traffic, like the top of the railing. I didn’t sand the bottom wood or the balusters and the paint seems to stick just fine. Make sure to get a paint that has a primer build in.
Ok I’ll sand. But how much do I have to sand?
You don’t need to use a sander. This was what scared me the most. Using a sander creates such a mess! Use a sanding block in 80-120 grit and just take the shine off the wood.
Do I have to prime before painting my stair railing?
Again, yes and no. Prime anything you sand. Prime wood, but don’t prime the parts already painted, just get a paint and primer in one and those areas will be fine.
I’m still nervous, what should I do?
Paint one area and test it. If it ends up not working that’s only a small area you’ll have to strip the paint on instead of having to redo the whole railing.
Can we not touch the railing for days?
Let it dry for 2-4 hours before touching. Then just try not to touch super frequently for 2 days. Don’t hang anything on the railing for at least a week. This will give the paint time to cure. We make our kids hold onto the railing every time they use the stairs and I didn’t have them stop doing that, except while it was wet.
I hope this was helpful! Please let me know in the comments if you have any questions.