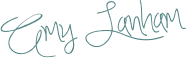
My mom found this hot air balloon picture on sale at Aaron Brothers and we figured we could do something with it to make it over. I don’t know why, but I love hot air balloons. When I found out I was pregnant, I knew I wanted to do baby’s room in hot air balloons. When we found out we were having a boy, we tweaked the theme a little bit to be more of a travel theme, with “Oh the Places You’ll Go” in mind. Most things that a hot air balloon are so girly! And I wanted something more gender neutral and rustic/vintage for his room.
When I originally saw this picture, we thought we would just paint the green on the sides of the hot air balloon a blue color because I love chevron. But as we got more things for his room, I realized the chevron probably wouldn’t go either. We talked about covering it with buttons, or doing a string art. But nothing seemed just right!
We knew the ribbon had to go, and thankfully it was just hot glued on so it easily came off with no issues. We decided to cover it with paper. So we went to Michaels and spent way too much time there! We were there for probably 2 hours and we left with $3.52 worth of stuff. I bought 5 12×12 scrapbook papers and a spool of the red and white thread. That was it. At home I already had the letter stamps to make the “dream big”, the blue and white thread, and the thread we used for the basket. I also had some foam dots that I used to raise the paper up so it is a little bit three dimensional. I also used the foam dots on the “dream big” letters.
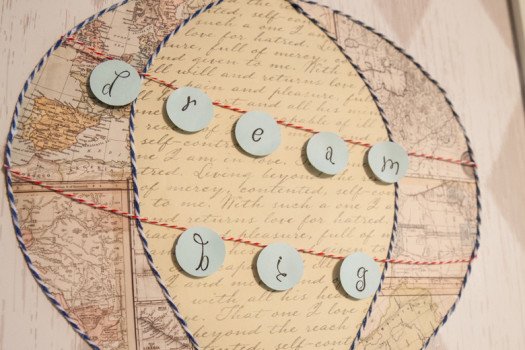
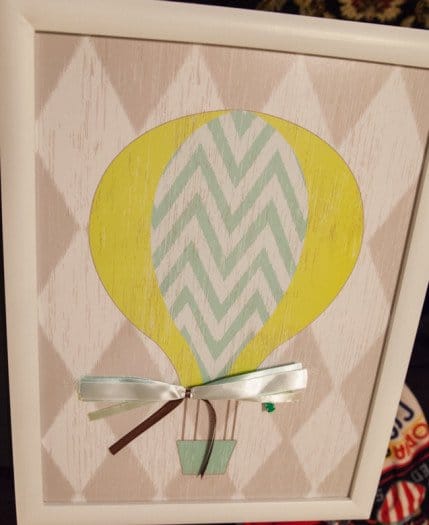
I traced the original hot air balloon design onto white paper and then used that as a guide to cut out the 12×12 scrapbook paper. I taped all the pieces together so that it would be one solid piece. I attached the red and white thread across at this point to by taping it to the back of the balloon. I wanted it to look like it was hanging from the balloon. Using the foam dots and some Modge Podge I glued the paper onto the board. I used the blue and white thread to outline the balloon and cover up some mistakes. I used Modge Podge to attach the thread and made sure it was soaked so that it would be a little stiff once the glue dried. I think used a circle punch to punch out the blue circles. I stamped on the letters with stamps and a black marker. I then attached the circles with blue dots. I just let the red and white thread hang naturally and didn’t attach it to the font in any way. I also used some wood like paper to make the basket.
I love that that letters can be changed out at any time. I think it would be cute to change them to “Happy Birthday” or “Good Luck” or “Congratulations” to coincide with life events.
For more DIY projects and pictures be sure to follow my Pinterest board!