
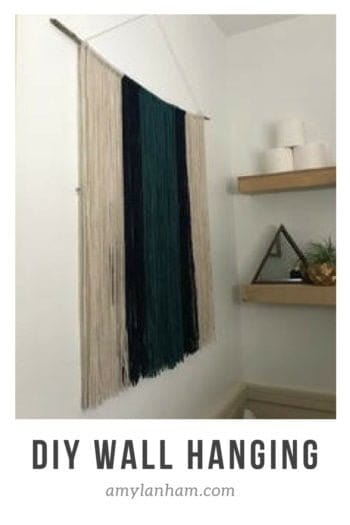
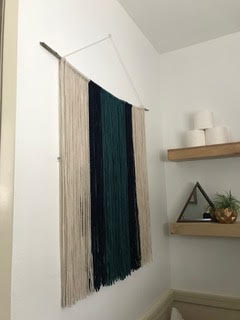
My bathroom stinks, and not in the way you’d think!! Ok so it doesn’t actually stink, but my bathroom that is the most used in the house had a sad little bath matt and matching towel, both taupe. IT was UGLY, and sad. So I decided to finally give it some love.
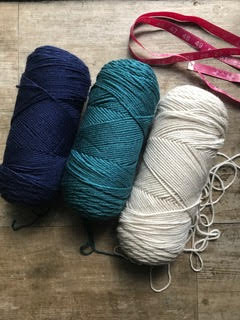
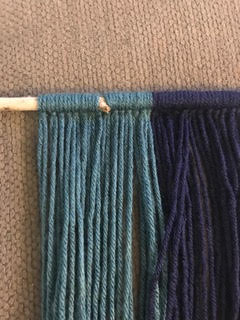
So I did what any other mom on a budget does and searched Pinterest for a cheap, cute idea to give my bathroom some color and flare. I came across the wall hanging trend and fell in love with the price, look, and ease of the project. So I headed out to Hobby Lobby and picked out a color scheme. I decided on three colors, but you can choose as many or as little as you want. Even one color would look beautiful.
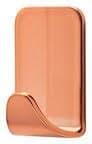
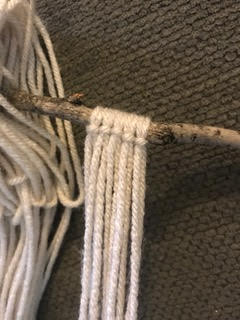
You can use a simple dowel from your local hardware store; I personally was a scavenger and found a really great twig from our yard to use. I loved the imperfect shape and look. In addition to the yarn and stick/dowel, you’ll need scissors and a nail for hanging. (If you are renting your place, and cant poke holes in the wall, a Command Brand hook works just as great.) 17032C Command(TM) Small Metallic Hooks, Copper Color
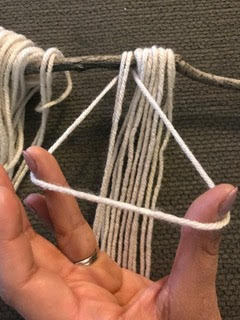
This could be a little time-consuming when it is time to start cutting. So I would advise picking the order in which you would like to place the yard before you begin to cut. The length of the yarn is up to you. Start long, because you can always trim the yarn to fit the spot you decide to hang it.
You use a simple knot loop to secure the yarn to the dowel or stick. If you decide to use a stick, you’ll come across little blemishes. Instead of trying to cover them, just work around them. It will still look great, and add character to the piece. You can count how many knots you have of each color to keep it even, organized, and uniform. Or you can throw caution to the wind and mix it all up. That’s what’s great about this; there is no wrong way to do it.
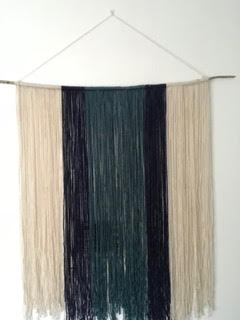
Once you have made it the size you like, tie another piece of yarn on either end. The yarn will have a lot of give, so it doesn’t need to be very long. This piece will be used to hang the wall hanging on your wall. Once you hang it, you can trim it as needed. So simple and so pretty. You can make one custom for every room if you’d like! So now our bathroom still stinks, but only sometimes and not because of our decor.
Erika Peterson is a little momma that loves to share tips for surviving her life with littles. She loves learning and sharing practical practices for healthy living & loving as a mom of toddlers. You can catch her tips and tricks on both Facebook and Instagram.

That is beautiful! And now you can tell everyone you made it when they oooo and ahhhh! great work. Thank you for sharing your beautiful art!